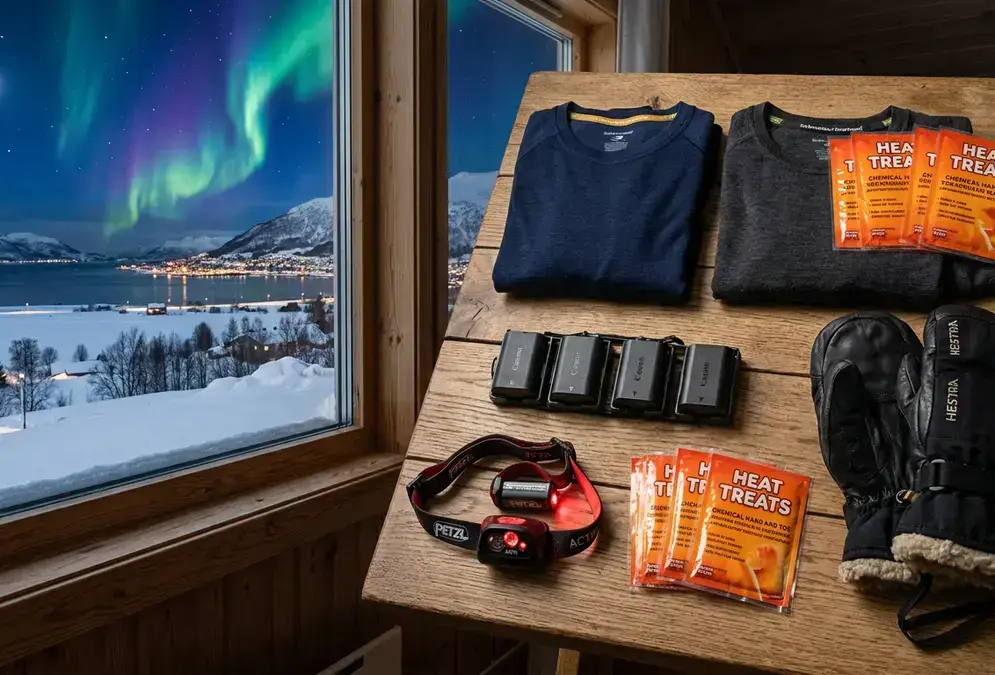

The three-layer system for aurora watching
Aurora watching is a stationary sport. When you step off a minibus onto an open hillside at midnight and stop moving, body heat from exertion stops. Your clothing system is on its own for the next two to three hours. One wrong layer choice that would be uncomfortable in a city becomes a cold, shortened night in Tromsø.
The base layer sits against your skin and moves sweat away before it chills you. Merino wool at 200-weight is the right material here, not synthetic fleece. Merino retains insulation when damp, which matters in Tromsø's maritime arctic climate where the cold is wet rather than dry. Cotton is not an option: it absorbs moisture and holds it against your skin like a cold compress.
The mid-layer traps body heat in dead air pockets. A 200 or 300-weight fleece jacket, or a down vest worn inside a heavier outer layer, does this well. Loft matters more than weight; the layer's job is air-pocket volume, not wind resistance.
The outer shell blocks wind and sheds precipitation. A hardshell jacket with a Gore-Tex or equivalent waterproof-breathable membrane stops wind chill from stripping the warmth your inner layers built. For the legs, softshell trousers work better than rigid ski pants for the slow sky-scanning of a long aurora watch.
Hands and feet: where cold wins fastest
Your body protects its core in the cold by restricting blood flow to your extremities. Hands and feet cool faster than your torso even when your layering system is working well, and they're the first to signal an inadequate kit at -12°C.
Mittens outperform gloves in extreme cold because fingers generate heat together in a shared pocket rather than each one working alone. The difference becomes meaningful below -10°C. The practical problem with mittens is camera handling: the solution is a thin merino or fleece liner glove inside the mitten, which you can briefly remove the outer shell from to adjust settings without exposing bare skin.
The full dressing guide at how to dress for arctic winter in Tromsø covers boot ratings in detail, but the short version is: insulated boots built for serious cold are the standard for standing stationary on snow for hours[2]. A boot rated for casual winter walking may feel adequate while moving but fall short once you stop. Merino wool socks add insulation inside the boot and stay warm even if your feet sweat.
6–8 hours
Toe warmers placed inside the boot toe box extend comfort substantially below -12°C. Chemical hand warmers go inside the mittens, not in your jacket pockets, where they warm nothing useful. Activate them before you leave the vehicle rather than once your hands are already cold.
Microspikes clip onto boot soles in seconds, fit in a jacket pocket, and grip ice. Tromsø's pavements and viewing spots are frequently sheet ice from January through March. They're inexpensive and easy to find at local outdoor shops.
Camera gear and electronics for the aurora
A smartphone camera does not photograph the aurora at full display. You need a DSLR or mirrorless camera with a wide-angle lens of f/2.8 or wider, and you need to operate it manually. At f/4 or narrower, the shutter speeds needed to freeze aurora motion are too slow, and the extended exposures required to compensate produce significant noise at the ISOs the night sky demands.
A full-frame sensor handles high ISO (1600 to 6400) with less noise than a crop sensor, but a crop-sensor body at f/2.8 produces workable results. Bring a sturdy tripod with rubber feet or spike tips that grip packed snow. A remote shutter release or intervalometer eliminates camera shake during the 5 to 15 second exposures a typical aurora display requires.
Cold air drains batteries significantly faster[1] than at room temperature. A battery that lasts three hours at sea level may last 40 minutes at -15°C in February. Bring at least two spare batteries and keep them in an inside jacket pocket against your body, swapping them in rotation. A chemical hand warmer tucked near the camera bag extends battery life significantly.
Featured · Destination
Northern Lights in Tromsø
At 69.6°N inside the auroral oval, Tromsø sees aurora at Kp 2. Peak season November–February. Best viewing spots, tour advice, and aurora forecast strategy.
The red-light headlamp is the piece of gear most photographers skip on a first trip and buy immediately after. White-light headlamps destroy dark adaptation, the process by which your eyes build light sensitivity over 20 to 30 minutes. With a red-light headlamp you can check camera settings, adjust focus, and read your screen without resetting your eyes. The practical difference: faint aurora curtains that looked like thin cloud before dark adaptation become visibly green, with structure and movement. For aurora photography technique, the northern lights photography guide covers composition and exposure settings in depth.
For the rest of your electronics kit:
- Extra memory cards; cold makes formatting fail more often than expected
- A fully charged portable battery bank for phone backup and offline maps
- A small lens cloth for condensation when moving between warm and cold environments
- A lens hood to reduce scatter from any ambient light sources at the viewing site
Buy vs. rent: what to pack, what to hire locally
Tromsø has a healthy rental market for arctic gear: standalone outfitters like the winter clothing rental service in town[3] let visitors hire thermal suits, insulated boots, and outer mittens independently of any tour booking. This matters practically: hauling a thermal suit and insulated boots through international airports is genuinely miserable, and renting locally makes sense for a single trip.
The rental option has real limitations worth knowing before you rely on it. Fit is the main issue with thermal suits: a suit that doesn't seal at the wrists and ankles loses heat at those gaps. Between sizes means colder. Full rental kits including boots at operators like Tromsø Outdoor run 400–545 NOK per person per day[4]; hotel delivery adds 125 NOK. Sizing stock is not unlimited, so book ahead.
Recommended tours
Tours are selected for quality, not commission. I earn a small fee if you book — at no extra cost to you.




The items worth bringing from home are the ones where personal fit directly affects warmth: your base layers, your merino socks, and any liner gloves. These sit against your skin; rental fit varies and rarely matches as well as gear chosen in your own size at home.
| Item | Action | Reason |
|---|---|---|
| Merino wool base layers | Pack from home | Fit against skin matters most; rental fit varies |
| Merino wool socks | Pack from home | Direct warmth gain inside rental boots |
| Thin liner gloves | Pack from home | Frequently missing from rental packages |
| Neck gaiter or balaclava | Pack from home | Rarely included in standard rental kit |
| Chemical hand and toe warmers | Pack from home | Available in Tromsø but priced for tourists |
| Outer thermal suit | Rent in Tromsø | Bulky to pack; tour operators stock conditions-tested sizes |
| Insulated arctic boots | Rent in Tromsø | Heavy; rental boots built for local ice and snow |
| Outer mittens | Rent in Tromsø | Bulky for travel; fine for a single-trip use |
Tour operators that supply kit have calibrated it for their specific conditions. Book a northern lights tour with guaranteed sightings with kit included and ask specifically whether boots are stocked in your foot size before confirming; some operators carry limited stock for larger sizes.
Budget reality: what three days in Tromsø actually costs
Tromsø is expensive by European standards, and the cost structure catches many first-time visitors off guard. A 3-day trip for two people at mid-range accommodation and moderate spending runs between €1,400 and €1,800[5], not counting flights. That is the honest baseline for a comfortable northern lights trip.
The biggest single cost is accommodation. Tromsø's limited hotel stock and peak-season demand drive nightly rates to €150 to €300 per room at mid-range properties[5]. The glass lodge experience at a property like Æra Panorama Glass Lodge falls at the top of that range but delivers a qualitatively different experience from a hotel room when the aurora fires overnight.
€1,400–1,800
Northern lights guided tours run €90 to €150 per person for a 6 to 8 hour chase[5]. Most visitors book two or three consecutive nights of tours to improve their odds, since cloud cover can cancel any single night. Three nights of tours for two people adds €540 to €900 to the budget[5].
Food costs vary significantly based on how you eat. Self-catering at Rema 1000 or Kiwi supermarkets runs €15 to €30 per person per day[5]; restaurant meals run €50 to €80. A practical approach: self-cater breakfast and lunch, eat one restaurant dinner per evening. Warm food before a cold night outdoors is also thermally sensible.
Booking logistics: when to reserve and how to get around
Peak Tromsø aurora season runs October through March, with January and February offering the longest polar night and the most consistently cold, clear conditions. December brings Christmas pricing. March adds slightly longer daylight hours but temperatures that often drop further than January.
Book accommodation 3 to 6 months in advance for peak winter dates. Tromsø has limited hotel stock relative to demand, and the properties nearest the waterfront fill first. Hostels book out nearly as fast as hotels in the December through February window. Direct hotel sites and Booking.com are both reliable for availability; direct booking occasionally offers marginally better rates.
Read next · Article
Stargazing Gear for Beginners: Binoculars to Telescopes
New to stargazing gear? This guide breaks down binoculars, telescopes, and smart telescopes, so you know what to buy first and what to skip for right now.
For Tromsø's city bus network, the routes cover most of the island, but aurora tours typically use minibuses that collect guests from their accommodation. See getting around Tromsø in winter for bus routes and how to reach viewing spots without a tour if you prefer self-guided nights.
Airport transfers run from Tromsø Airport (TOS) to the city center in about 30 minutes. The Flybussen airport coach is the budget-friendly option; taxis cost noticeably more for the same ride. Most international flights connect through Oslo (OSL) on Scandinavian Airlines or Norwegian Air.