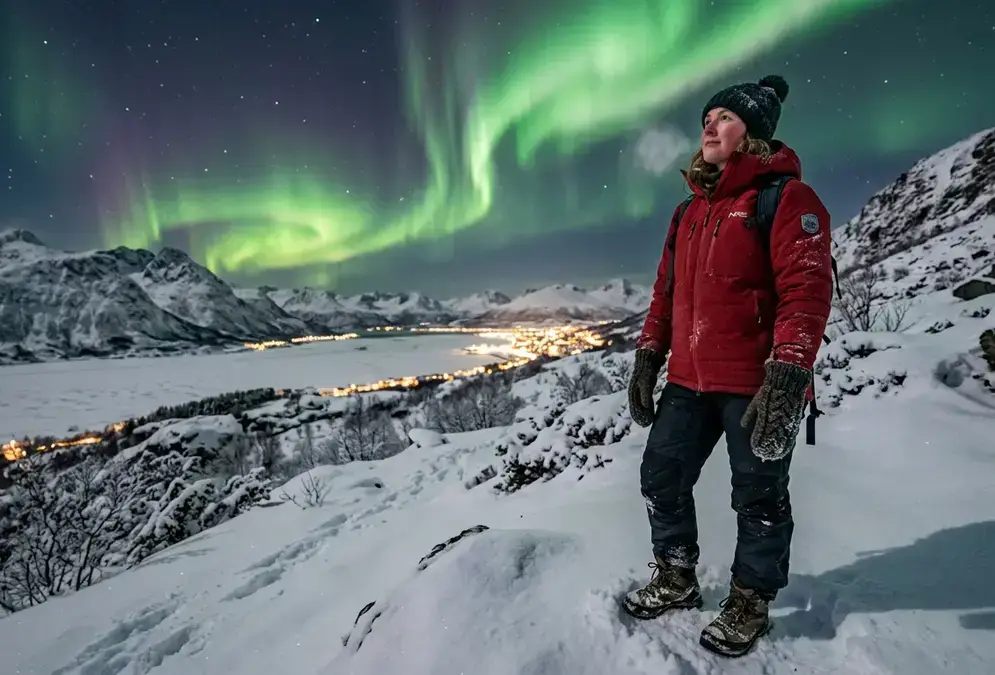

What Tromsø's cold actually means for your clothing
Tromsø, at 69.6°N, is well inside the Arctic Circle, and its winter cold behaves differently than cold further south. Average temperatures from November through March run around -2°C to -4°C, which sounds manageable until a northerly blows off the Barents Sea and the thermometer drops to -14°C or lower. The recorded low for Tromsø is -20°C, reached in February 1985[1]. On any given aurora night, you might be standing outside at those numbers.
Polar night runs from late November to mid-January, when the sun never clears the horizon — locals get through it with more than the right jacket, but the clothing still has to hold up first. Snow covers the ground continuously from November through April[2], which means ice underfoot throughout the season. Tromsø's maritime location also makes the cold wet rather than dry, and wet cold strips heat faster than dry cold at the same air temperature. That distinction drives most of the clothing decisions that actually matter.
The wind chill factor changes the effective temperature significantly. An air temperature of -8°C with a 30 km/h wind feels closer to -16°C on exposed skin. Aurora tours operate at the coldest part of the night, not the warmest, and often at the most exposed locations outside the city.
-2°C to -20°C
Most visitors dress for a Scandinavian city break rather than for standing stationary in an open field at midnight in February. That gap between city-break dressing and cold-weather dressing is the gap between a memorable night and a miserable one.
The three-layer system
The three-layer principle is not complicated, but each layer has a specific job, and one wrong choice breaks the whole system. Getting a layer wrong in a city costs you comfort; getting one wrong at -15°C costs you warmth you cannot recover without going indoors.
The base layer sits against your skin and does one job: move sweat away from your body before it cools and chills you. Merino wool is the best material for this in wet arctic conditions. Its naturally crimped fibers create tiny air pockets that retain warmth even when the wool gets damp[3], unlike synthetic base layers, which lose insulation when saturated. Merino is also naturally odor-resistant, which matters if you're wearing the same base layer across several consecutive nights of aurora hunting. Synthetics dry faster, and for active hiking that advantage shows; for standing still in arctic cold, merino outperforms them.
Cotton is not a base layer for arctic use. In wet, cold conditions, cotton absorbs moisture and holds it against your skin, pulling your core temperature down. Experienced cold-weather guides treat this as a safety point, not a preference.
The mid-layer provides insulation. A 200-weight or 300-weight fleece jacket works well, or a down vest worn under a thicker outer jacket. The principle: trap body heat in still air. The mid-layer doesn't need to be waterproof; that's the outer shell's job. What it needs is loft, because loft creates dead air pockets, and dead air is what actually keeps you warm.
The outer shell blocks wind and repels precipitation. A hardshell jacket with a Gore-Tex or equivalent membrane stops wind chill from stripping the warmth your inner layers built. For legs, softshell pants often work better than rigid ski trousers for aurora viewing because they allow easier movement while still blocking wind. The outer layer doesn't need heavy insulation if the mid-layer is working correctly.
Hands and feet: where warmth collapses first
Extremity warmth is the part most first-time arctic visitors get wrong because it is not intuitive. Your body protects your core by constricting blood flow to your hands and feet when it senses cold, so your extremities cool faster than your torso even in identical conditions. They're also the parts most exposed during aurora viewing, when your hands are out checking a camera or phone.
Mittens beat gloves in extreme cold because fingers generate heat together in a shared pocket rather than each finger working alone. The warmth difference is noticeable at -10°C and becomes significant at -20°C. The practical problem with mittens is camera operation. The solution: wear a thin merino wool or fleece liner glove inside the mitten. You can pull the mitten off briefly to adjust camera settings, then slip it back on. For more on managing camera gear in arctic conditions, see how to photograph the northern lights.
For feet, insulated boots rated to at least -30°C are non-negotiable if you're standing still on snow for hours[4]. Boot ratings assume static conditions; movement generates body heat that compensates somewhat, but aurora viewing is stationary. Get the colder rating. Merino wool socks add a layer of insulation inside the boot and stay comfortable over the multi-hour waits that aurora tours involve.
Microspikes or slip-on crampons attach to the sole of your boot and grip ice. Tromsø's pavements and outdoor viewing spots are frequently sheet ice from January through March[6]. A set of microspikes is inexpensive, fits in a jacket pocket, and may genuinely prevent a fall on an otherwise excellent night.
Aurora viewing changes the calculation
Hiking in Norway in winter is cold but manageable: your muscles generate heat, your circulation stays active, and you can feel problems developing and fix them. Standing still for two or three hours at midnight is a different problem entirely. When you stop moving, you're entirely dependent on your clothing system to maintain warmth, with no body heat from movement to compensate.
Chemical hand warmers provide 6 to 8 hours of continuous heat[5], and they're worth treating as non-negotiable for aurora nights below -10°C. Slip one into each mitten and one into each boot toe box. They add enough heat to make the difference between manageable cold and a miserable night when the temperature drops toward -15°C. A secondary benefit: warmers tucked into jacket pockets or a camera bag maintain camera battery performance, which drops sharply in cold air. A battery that lasts three hours at room temperature may last forty minutes at -15°C.
Recommended tours
Tours are selected for quality, not commission. I earn a small fee if you book — at no extra cost to you.




Hood geometry matters more than most people expect. Some expedition parkas have hoods so thick and stiff that they block peripheral vision. For aurora watching, you want to see the whole sky, including the band of light that sometimes appears low on the horizon before a full display builds overhead. A hood you can push back easily, rather than one fixed around your face, lets you scan without constantly adjusting gear.
Read next · Guide
Best Northern Lights Spots near Tromsø: Complete Guide
Seven aurora viewing spots ranked near Tromsø, rated Bortle 2-6, from a 25-30 minute walk to Telegrafbukta to a 90-minute drive to Lyngenfjord's clearer sky.
Don't overdress on the journey to the viewing site. Minibuses on organized aurora tours run very warm to compensate for the outside temperature, and arriving at the viewing location already sweating means your base layer starts wet. Look for a guaranteed-sighting aurora tour that provides thermal suits and boots: operators who supply their own kit typically know what survives their specific conditions. Dress for the outside during the drive, and sit with your jacket partially unzipped.
Layering flexibility is the underrated skill. The right system isn't only about maximum warmth; it's about being able to add or remove a layer in response to wind, cloud cover, or how long you've been standing still. A system you can adjust in the dark, in mittens, is more useful than one maximized for a single temperature.
What to rent, what to bring from home
Tromsø has a healthy rental market for arctic gear, and organized northern lights tours frequently include thermal suits, boots, and gloves as part of the tour price. This is practical if you're visiting once and don't want to invest in specialized kit you'll rarely use again. Rental gear has consistent limitations worth knowing before you rely on it, though.
Fit is the main issue. A thermal suit that doesn't seal at the wrists and ankles loses heat at those gaps. Between sizes means colder; a loose suit is noticeably colder than a well-fitted one. Rental boots are heavy and often stiffer than touring-grade alternatives, which matters less if you're standing still but can be uncomfortable on longer walks between viewing spots.
For the full breakdown of what to pack beyond clothing, see the Tromsø winter packing list.
| Gear | Action | Why |
|---|---|---|
| Merino base layers | Bring | Fit against skin matters most; rental fit varies |
| Merino wool socks | Bring | Measurable warmth gain inside rental boots |
| Liner gloves | Bring | Often missing from rental packages |
| Neck gaiter / balaclava | Bring | Frequently absent from rental stock |
| Chemical hand and toe warmers | Bring | Available in Tromsø but priced for tourists |
| Outer thermal suit | Rent | Bulky to pack; operators stock conditions-tested kit |
| Insulated arctic boots | Rent | Heavy; rental boots are built for Tromsø ice |
| Outer mittens | Rent | Bulky; fine to borrow for a single trip |
Putting it together: a zone-by-zone checklist
Temperature drops happen fast when you step off a warm minibus onto arctic ground. Having your system thought through by body zone means you step outside ready, rather than adjusting cold fingers in the dark.
Head: A wool or fleece hat covering the ears is the highest-priority single piece. Significant body heat escapes through the head, and uncovered ears are the fastest route to real pain in sub-zero conditions. Add a neck gaiter or balaclava you can pull up over your nose and mouth when wind picks up. Choose a hat or hood that doesn't block your sky view; you're there to watch, not tunnel-vision forward.
Read next · Article
Stargazing Gear for Beginners: Binoculars to Telescopes
New to stargazing gear? This guide breaks down binoculars, telescopes, and smart telescopes, so you know what to buy first and what to skip for right now.
Torso: Three layers as described above: merino base, fleece or down mid, windproof outer shell. For aurora nights, tuck a chemical hand warmer into each jacket pocket to keep the exterior layer warm at the point where your hands reach out.
Hands: Thin liner glove, outer mitten over it, chemical hand warmer inside the mitten. Practice switching between liner-only and full mitten before you go outside. Cold fingers and unfamiliar glove fumbling reliably causes missed shots during the best moment of a display.
Legs and feet: Merino base layer, then insulated ski pants or softshell trousers. Wool socks, then boots rated -30°C, then a toe warmer inside the boot, then microspikes over the sole. Check the microspike attachment before leaving the bus: clipping them on in the dark at -12°C while your tour group waits is an avoidable stress.