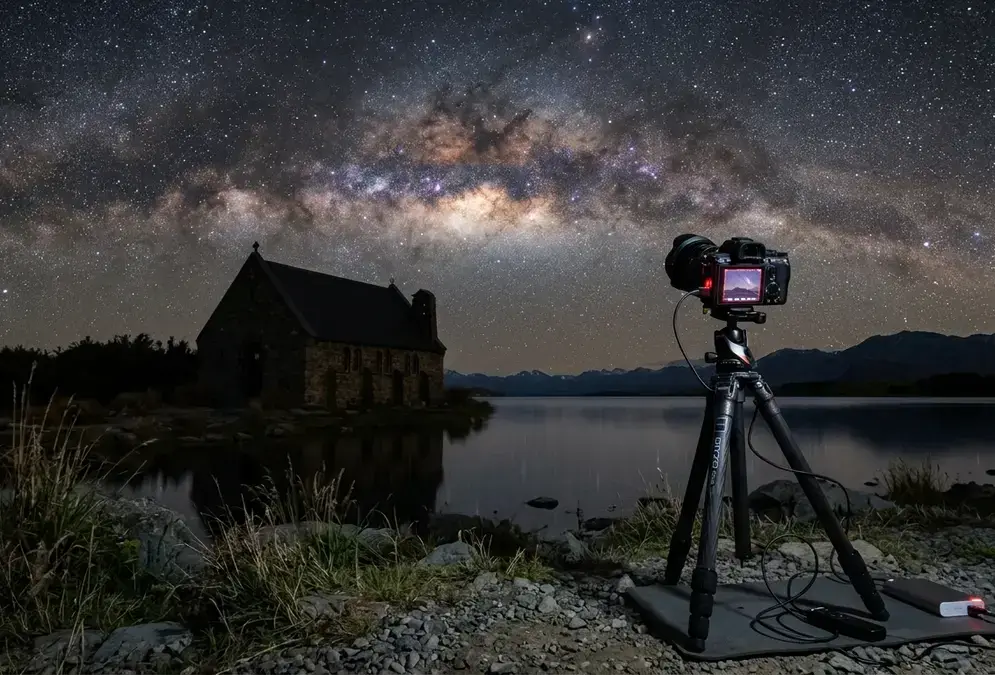

Camera body: what Bortle 2 and a Gold Tier sky actually buy you
Aoraki Mackenzie doesn't just look dark to the eye. The reserve's night sky measures Bortle Level 2 across the full 4,367 square kilometres the International Dark-Sky Association covers, a rating that puts it among the small number of places on Earth still classed as a truly dark site with high astronomical observability[1]. That number matters more than any spec sheet: a sensor reads a Bortle 2 sky the same way the eye does, pulling in real signal at ISO settings that would drown in skyglow anywhere near a city.
Bortle 2
Aoraki Mackenzie is also one of only four Gold Tier International Dark-Sky Reserves anywhere in the world, the highest classification the IDA awards, alongside NamibRand in Namibia, Kerry in Ireland, and Central Idaho in the United States[2]. That rarity is why a modest camera body still comes home with a usable Milky Way frame here. You don't need a five-figure astro rig to start; any interchangeable-lens camera with full manual control over aperture, shutter speed, and ISO gets you a real result under this sky.
Where a full-frame sensor earns its keep is on the reserve's specific southern-sky targets, not the base exposure. The Large Magellanic Cloud and the globular cluster Omega Centauri are both dim, extended objects that reward a sensor gathering more light per pixel, and a full-frame body holds more shadow detail in those targets than an APS-C crop sensor pushed a stop higher to compensate. Manual focus and manual exposure are the baseline either way; autofocus hunts uselessly once the sun is down. For the broader beginner kit, binoculars, apps, and general night-sky gear, see Stargazing Gear for Beginners; this piece stays camera-specific to Aoraki Mackenzie.
Lens: fitting an overhead core and the Church of the Good Shepherd in one frame
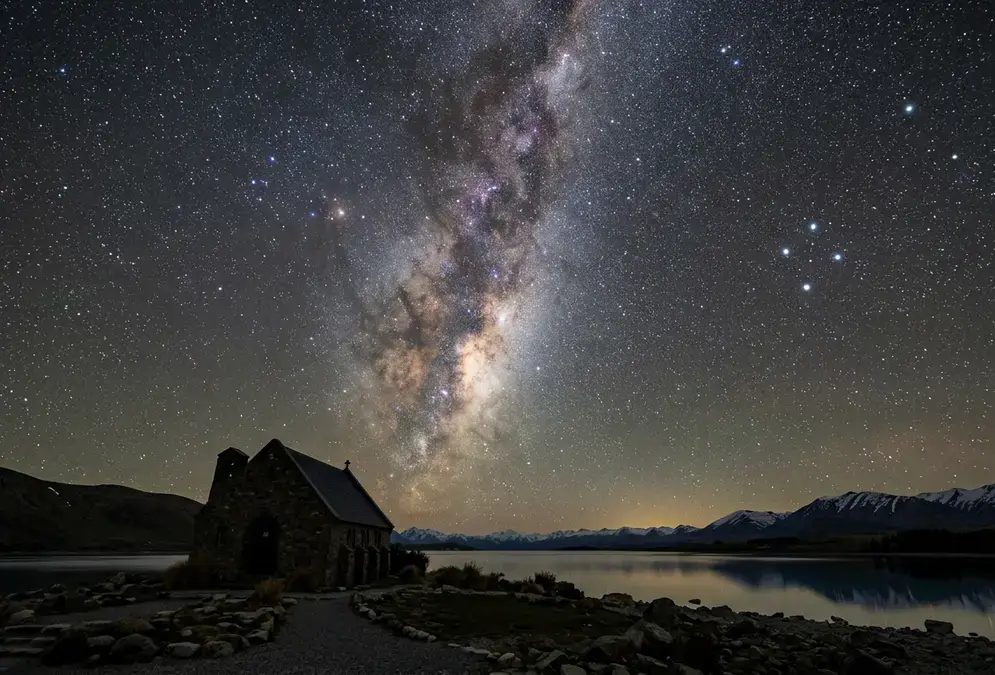
Point a camera south from Jasper, Tenerife, or the Atacama and the galactic core sits low, skimming the horizon for most of the night. Point one south from Lake Tekapo in New Zealand's winter and the core sits almost directly overhead, a genuinely different composition problem[3]. A lens built for a horizon-hugging core, the kind most Milky Way guides assume, leaves you cropping out the best part of the sky or fighting a composition it was never designed for.
The fix is the same wide, fast glass every dark-sky cluster calls for, 14mm to 24mm at f/2.8 or faster, used differently. At the wide end of that range, 14 to 16mm, you can hold enough sky above the frame and enough foreground below it to keep the core's full arch and a real subject in the same shot, rather than pointing straight up at a blank patch of stars.
That subject, more often than not, is the Church of the Good Shepherd, the small stone chapel on Lake Tekapo's shoreline and one of New Zealand's most photographed buildings[4]. Shot low and wide, its silhouette against the lake gives the overhead core something to arc away from instead of floating in an empty frame. The same composition works from the open shoreline near Mount John's access road, with the observatory ridge standing in for the church.
Coma, the aberration that turns pinpoint stars into small comet-shaped smears toward the frame's corners, shows up more on this kind of shot than on a plain sky-only composition, because the corners are doing real work holding the chapel's roofline or the lake's edge. A lens that stays genuinely sharp at f/2.8 into the corners, not just the centre, is worth the extra cost here. For the full exposure-triangle settings behind these numbers, see How to Photograph the Milky Way.
Tripod: Lake Tekapo's lake breeze and Mount John's summit gusts
Long exposures need a completely still camera, and the Mackenzie Basin gives you two different kinds of wind to plan around. Down at Lake Tekapo's shoreline, the problem is usually subtle: just enough breeze off the water to put ripples through a reflection shot, or enough vibration through the tripod legs to soften a 20-second exposure. Up the access road toward Mount John Observatory, the open, elevated ground brings steadier gusts that never really let up after dark.
A carbon-fibre tripod, rated well above the combined weight of your camera and lens, is the baseline for either spot. Carbon fibre damps vibration meaningfully faster than aluminium, which matters more here than the tripod's price tag might suggest: a gust catching the legs mid-exposure ruins the frame regardless of how expensive the camera above it is. Keep the centre column fully retracted; raised for extra height, it turns a stable three-legged platform into a wobbly monopod exactly when you need it steadiest.
For a reflection shot at the lakeshore, position one leg facing into any breeze and hang a weighted bag from the centre column hook for extra ballast. Arrive early and give the water ten or fifteen minutes to settle after a passing gust or a boat's wake; a mirror-still lake takes patience, not gear. Higher up toward Mount John, there's no water to settle, just steady wind, so budget for the sturdier tripod and a shorter list of compositions attempted per session rather than repositioning every few minutes.
Featured · Destination
Aoraki Mackenzie Stargazing
Aoraki Mackenzie is one of only four Gold Tier Dark Sky Reserves on Earth: Bortle 2 skies over Lake Tekapo, the Southern Cross, and Mount John Observatory tour.
Star tracker and equatorial tracking: what Alpha CruX's private lesson actually adds
Two of the reserve's headline targets ask more of a camera than a single wide-angle frame can deliver. The Large Magellanic Cloud, a dwarf galaxy holding roughly 10,000 million stars, and Omega Centauri, the sky's most striking globular cluster at roughly 10 million stars packed into one spherical patch, are both naked-eye southern-sky objects invisible from the Northern Hemisphere[3]. Pulling real structure out of either one means longer exposures than the 500 Rule's ceiling allows on a static tripod, which is where a star tracker earns its bag space.
An equatorial tracker compensates for Earth's rotation during the exposure, letting a wide-angle lens hold a frame steady for minutes instead of seconds without star trailing. That extra exposure time is what turns the Magellanic Clouds from a faint smudge into a photograph with real dust-lane and star-cluster detail.
Recommended tours
Tours are selected for quality, not commission. I earn a small fee if you book — at no extra cost to you.




If you'd rather try one before buying, Alpha CruX's private astrophotography lesson builds this into the session: up to three hours, one instructor, working under a Department of Conservation concession that lets the mobile operator choose sites around Twizel, Tekapo, and Aoraki/Mount Cook rather than a single fixed spot, with access to equatorial tracking gear included in the $590 NZD price[5]. It's aimed at photographers who already own a camera, lens, and tripod and want camera-specific coaching rather than a shared-telescope tour.
Read next · Tour
Aoraki Mackenzie Astrophotography Tour
Private astrophotography tuition in New Zealand's Gold Tier dark sky reserve: camera coaching, star tracking, and Milky Way composition near Lake Tekapo.
For a lower-cost, less gear-focused evening, Dark Sky Project's Summit Experience at Mount John Observatory runs a 16-inch telescope session for $219 NZD per adult ($169 for children), roughly 1 hour 45 minutes, with some astrophotography elements built in[6]. It needs no equipment of your own, which makes it the better starting point if your kit stops at a phone camera.
Batteries and alpine cold: colder than a lakeside evening, nowhere near Arctic
Mackenzie Basin nights turn properly cold once the sun is down, colder again after midnight, though this is high-country alpine cold rather than the Arctic conditions of Fairbanks or Tromsø elsewhere in this portfolio. Cold slows the chemical reaction inside a battery, temporarily cutting the charge it can deliver even though the battery itself isn't damaged. Bring two or three spare batteries and keep the ones you're not using in an inside jacket pocket rather than the camera bag; a cold battery often recovers some capacity once it warms back up against your body.
Condensation is the more Aoraki-specific problem, especially close to Lake Tekapo's shoreline. A lens that starts a session at ambient outdoor temperature fogs from the inside out as the glass cools further through the night, right when the shot finally comes together. A battery-powered dew heater band wrapped around the barrel just behind the front element keeps the glass a few degrees above the dew point for the whole session; adhesive hand warmers strapped on with an elastic band do the same job more cheaply, if less precisely.
The other failure mode is moving gear between temperatures too quickly. Carrying a cold camera bag straight into a warm lodge room condenses moisture on and inside the equipment just as surely as the reverse does. Seal the bag before you go indoors, and let it warm up gradually with the zip closed. If you're staying somewhere close enough to walk back between sessions, like this boutique hotel near the Tekapo shoreline, that short walk is exactly the kind of temperature jump this rule is written for.
Where to point the lens: three Aoraki Mackenzie compositions worth building a night around
Three locations do most of the work on an Aoraki Mackenzie astrophotography trip, and each rewards a different setup.
- Church of the Good Shepherd, Lake Tekapo shoreline: shoot wide, 14 to 16mm, low to the ground, with the chapel's stone silhouette anchoring the bottom of the frame and the overhead core arching above it. Arrive well before full dark to check the crowd; this is the single most photographed spot in the reserve, and a tripod needs elbow room.
- Mount John Observatory ridge: from the open ground near the access road, the observatory's dome silhouette makes a distinctive foreground against the arch, and the elevation gives an unobstructed sightline across the basin. Wind runs steadier up here, so the sturdier tripod setup matters more than the exact focal length.
- Aoraki/Mount Cook Village: roughly an hour further from Tekapo, the mountain itself replaces the chapel as foreground. A 20 to 24mm focal length holds Aoraki/Mount Cook's silhouette at a scale that reads clearly without swallowing the sky above it.
| Location | Best focal length | Foreground challenge | Best conditions |
|---|---|---|---|
| Church of the Good Shepherd, Lake Tekapo | 14–16mm | Crowds and chapel silhouette scale | Calm night, arrive early for space |
| Mount John Observatory ridge | 16–20mm | Steady summit wind | Clear night, sturdy tripod |
| Aoraki/Mount Cook Village | 20–24mm | Mountain scale in lower third | New moon, core well clear of the peaks |
Getting to any of these three means committing to the trip properly. Christchurch sits roughly three hours away by road, Queenstown roughly two[4], and this cluster is one of the more remote stops in this site's coverage: most travellers are looking at a long-haul flight into New Zealand before the drive even starts. Build that into the itinerary, and see Best Time for Stargazing at Aoraki Mackenzie for the season that makes the long trip worth it.