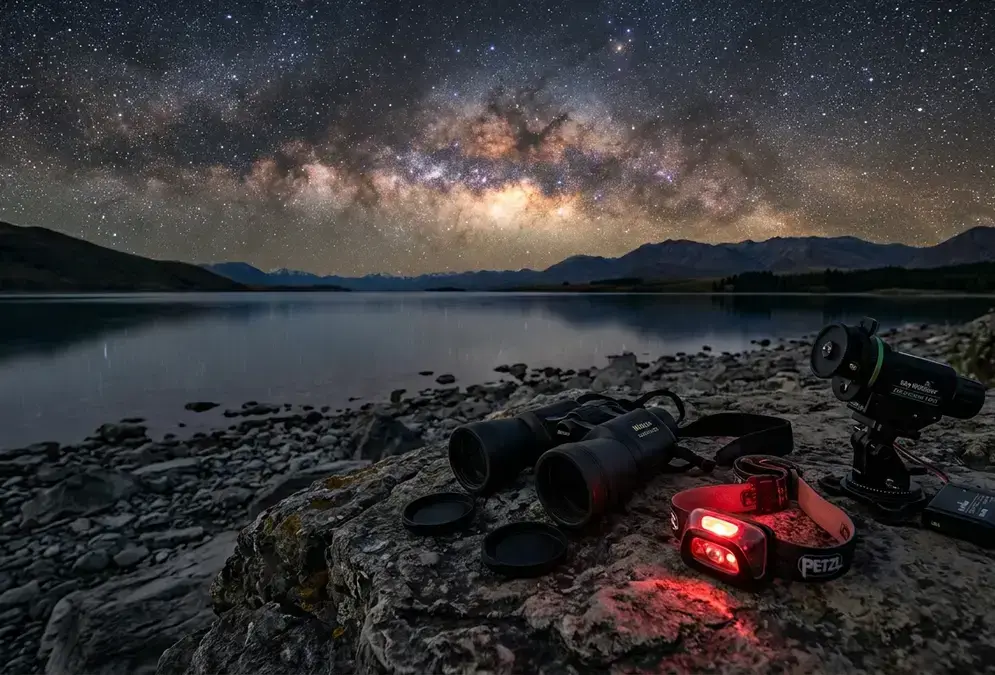

What Aoraki Mackenzie actually demands from your kit
Most gear guides for dark-sky travel assume one of two extremes: desert heat swinging into desert cold, or genuine Arctic winter. Aoraki Mackenzie is neither. This is alpine lake country, glacier-fed and sheep-farmed, inside a Bortle Class 2 reserve that earned Gold Tier status, the highest classification the International Dark-Sky Association awards, by simply never losing its dark sky to development[1]. The cold here isn't extreme by Arctic standards, but it's real: standing still beside Lake Tekapo for two or three hours after dark is a different proposition from walking a hiking trail in the same air temperature, whatever season you land in.
The second constraint has nothing to do with the sky. Aoraki Mackenzie sits at the end of a long-haul flight and a multi-hour domestic connection, among the more remote stops on any dark-sky itinerary[1], and that changes what belongs in the bag. You're not driving across a border with a full kit in the trunk. You're packing what survives a long-haul cabin allowance, and every extra kilogram costs more here than it would for a short regional hop to somewhere like Tromsø. For the full picture of the reserve beyond gear, see Aoraki Mackenzie stargazing.
What actually earns space in that bag:
- A pair of binoculars rather than a travel telescope
- A rechargeable red-light headlamp for the walk back from the lakeshore
- A star tracker, only if long-exposure photography is the goal
- A genuine three-layer clothing system, not just one warm jacket
The rest of this guide works through each of those in turn, starting with the decision most travelers overthink.
Optics: why binoculars beat a travel telescope at Mount John
The most common question before a Tekapo trip is whether to bring a small telescope. Skip it. Dark Sky Project runs the Summit Experience, a guided 1-hour-45-minute session inside the private dome atop Mount John using a 16-inch reflector and working astronomy guides, priced at $219 NZD for adults ($169 for children aged 10 and up), with that pricing confirmed through 30 September 2026[2]. You'll see more through that instrument in one evening than a week spent fumbling with an unfamiliar travel scope in the cold and dark.
A portable telescope has three problems here that binoculars don't. It needs polar alignment for the Southern Hemisphere, using the South Celestial Pole rather than Polaris as the reference point. It needs time to cool down after coming out of a warm car or lodge room. And its collimation drifts after two flights and a long drive. At altitude or in the cold, hands shake, and manually tracking a target at high magnification gets genuinely difficult in the dark. None of that applies to a pair of binoculars.
Binoculars earn their place because Aoraki Mackenzie's best targets are wide-field, not point sources. The Large and Small Magellanic Clouds, two companion galaxies invisible from Europe and the continental United States, span several degrees of sky each, and the same is true of the galactic core itself, arching directly overhead through the New Zealand winter rather than skimming the horizon the way it does at every stargazing destination north of the equator[3].
For this sky, a 10x50 is the standard choice: 10x magnification, 50mm aperture, an exit pupil around 5mm, close to what a dark-adapted eye actually uses. A 7x50 trades some magnification for a wider field and a bigger exit pupil, useful if your night vision isn't especially sharp. An 8x42 is the more packable travel option, easier to hold steady once the cold has your fingers stiff. Past 10x, you need a tripod adapter to keep the view still, cold hands tremble more than warm ones. See the stargazing gear for beginners guide for the full breakdown of when it's worth sizing up from binoculars to a telescope of your own.
| Approach | Best targets | Setup required | Verdict for Aoraki Mackenzie |
|---|---|---|---|
| Naked eye | Southern Cross, Magellanic Clouds, meteor showers, the winter galactic arch | None; optimal for dark adaptation | Essential every night, do this first |
| 10x50 binoculars | Magellanic Cloud detail, Omega Centauri, open clusters | None; ready immediately | Recommended: the right tool for this sky |
| 8x42 binoculars | Milky Way sweeping, brighter clusters, wide-field views | None; most packable format | Good compromise for the long-haul flight |
| Travel telescope (up to 90mm) | Planets, double stars, lunar detail | Southern polar alignment, cooldown, collimation | Skip it, book the Summit Experience instead |
| Mount John Summit Experience (16-inch) | Galaxies, nebulae, planets, globular clusters | None; guide-operated | Book this: the best view available at Tekapo |
Red light and dark adaptation: protecting your night vision
Dark adaptation is the shift from your eyes' daytime cone vision to low-light rod vision, and it takes roughly 20 to 30 minutes to develop fully. A single glance at a white phone screen resets it instantly, for you and for anyone standing near you. The reason a red-light headlamp fixes that: the eye's rod photoreceptors are barely sensitive to wavelengths above roughly 650nm[4], so red light lets you check a map or adjust a tripod head without erasing half an hour of adaptation. On a Summit Experience tour or an independent night on the Tekapo lakeshore, one bright screen can cost the whole group its night vision at once.
Any headlamp with a genuine dim red mode works; a specialist astronomy torch isn't necessary. The spec that actually matters is dimness, not just colour: a bright red beam still nudges your eyes out of adaptation. Bring it rechargeable if you can. Alkaline batteries lose a meaningful share of their charge once the Mackenzie Basin's overnight cold sets in, and a lodge room with a USB outlet is more reliable than a bag of spares.
20-30 min
Download your sky app's star maps before you leave Tekapo township. A free planetarium app like Stellarium or SkySafari does the identification work, but mobile coverage thins out fast once you're on the lakeshore or up at Mount John, and an app that needs live data to load the sky is useless at the exact moment you need it. A planisphere calibrated for roughly 44°S works as a battery-free backup, and it forces you to actually learn the relationships between the Southern Cross, the Magellanic Clouds, and the winter galactic arch rather than just pointing a phone at bright dots.
Star trackers: only if you're chasing the Milky Way through a lens
A star tracker is a small motorised mount that rotates a camera at Earth's sidereal rate, cancelling the planet's own rotation so stars stay pinpoint instead of streaking across the frame. Without one, a camera exposure longer than roughly 15 to 20 seconds records trails rather than points. With a tracker, 2 to 5-minute exposures become possible, enough to pull real detail out of the galactic core's dust lanes and the fainter reaches of the Magellanic Clouds.
For visual-only visitors, a tracker changes nothing. The Summit Experience's 16-inch reflector already has its own driven mount; you just look through the eyepiece. Pack one only if a camera is coming along regardless, and most people photographing this sky do bring one. A compact travel tracker weighing roughly 0.8 to 1.5 kg fits in a carry-on and mounts on a standard tripod ball head.
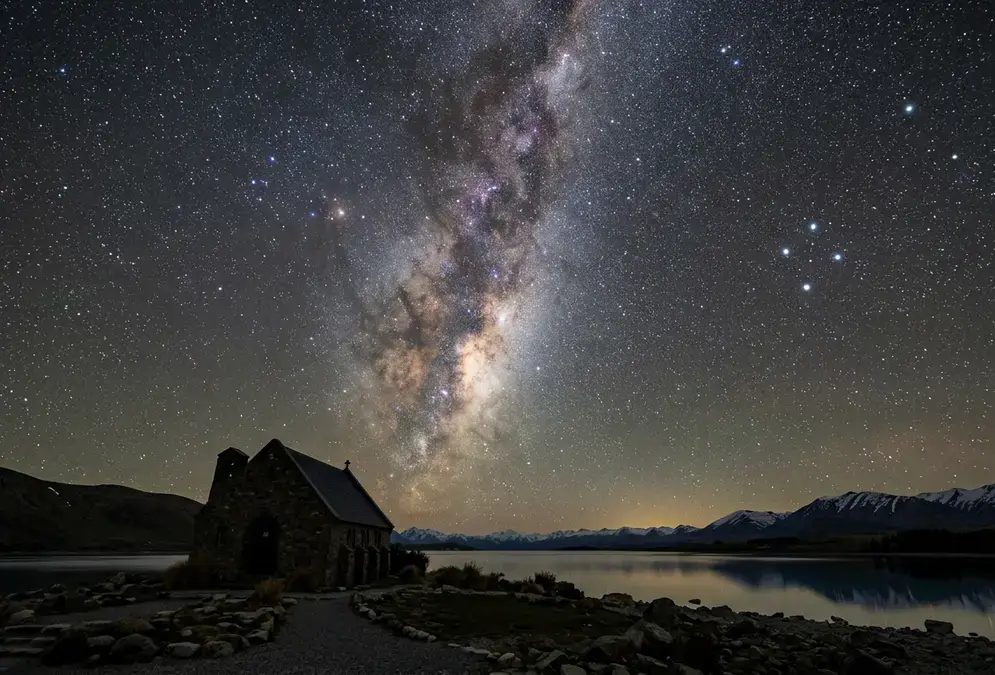
Featured · Destination
Aoraki Mackenzie Stargazing
Aoraki Mackenzie is one of only four Gold Tier Dark Sky Reserves on Earth: Bortle 2 skies over Lake Tekapo, the Southern Cross, and Mount John Observatory tour.
Polar alignment down here uses the South Celestial Pole, not Polaris, as the reference. Sigma Octantis, the faint south polar star at around magnitude 5.5, sits within about a degree of true south but is dim enough to disappear under any real light pollution. At Aoraki Mackenzie's Bortle 2 sky, on a clear new-moon night, it's visible plainly enough to align against. For the full mechanics of timing a shot around moon phase and galactic-core season, how to photograph the Milky Way works through settings device by device.
Layering for alpine-lake cold, not desert cold
Aoraki Mackenzie's cold isn't what stargazing gear for the Atacama prepares you for, and it isn't Fairbanks' Arctic cold either. It's a damp, breezy, alpine-lake cold that gets underestimated because the daytime temperature reads mild. Standing still beside Lake Tekapo for two or three hours after dark, in June through August or even December through February, drops your effective temperature further than the forecast suggests, because stillness cancels the body heat that walking generates[5]. Dress warmer than the number on your phone would suggest, and build in extra layers you can add as the night gets colder rather than removing them.
Recommended tours
Tours are selected for quality, not commission. I earn a small fee if you book — at no extra cost to you.




A three-layer system covers both windows:
- Base layer: moisture-wicking merino or synthetic thermal, against skin
- Mid layer: fleece or a light down sweater, the one you add back on as the sun drops
- Outer layer: an insulated down or synthetic jacket, non-negotiable for any session past 10pm
For extremities, a hat that actually covers the ears matters more than most travelers expect, and two weights of gloves beat one: thin liners for adjusting a tripod head or binocular focus, heavier mitts for everything else. Wool socks end a session less often than cotton ones do. A neck gaiter closes the gap where warm air escapes the jacket collar, a small detail with a real effect after an hour standing still by the lake.
Winter (June through August) asks more of this system than summer does; it's the longer, colder, darker window, worth the extra layer if the galactic core arching overhead is the actual point of the trip. Summer's shorter, milder nights are more forgiving on gear but weaker on the sky itself. Best time for stargazing at Aoraki Mackenzie covers that seasonal trade-off in full.
The complete pack list for the long-haul flight south
Everything above assembles into one carry-on-friendly kit, not a bag that needs its own suitcase. That matters more here than for a short regional trip: Aoraki Mackenzie sits at the end of a long-haul flight and a multi-hour drive[1], and every extra kilogram in checked luggage is a kilogram you're hauling through Auckland or Christchurch and back.
The full list, in the order it earns its place:
- 10x50 or 8x42 binoculars, the single highest-value item in the bag
- Rechargeable red-light headlamp, dim mode, charged before each session
- Star tracker (0.8-1.5kg), only if a camera is coming too
- Three-layer clothing system: merino base, fleece or down mid, insulated outer
- Wool socks, two-weight gloves, a hat covering the ears, a neck gaiter
- Offline sky app or a planisphere calibrated for roughly 44°S
One thing you don't need much of, unlike a desert trip: sun protection is a daytime concern here, not a stargazing one. If your itinerary pairs Tekapo with hiking around Aoraki/Mount Cook Village, pack sunscreen and sunglasses for the trail; you won't need either once the sun goes down. See what to do at Aoraki Mackenzie beyond stargazing for how travelers usually fill those daylight hours. What you will need, whichever season you land in, is the patience for genuine weather cancellations: cloud cover regularly forces Summit Experience tours to reschedule, and no operator here can promise you a clear night on any given evening[6]. Book two or three nights, not one, and treat the first clear evening as the bonus it is. The Southern Cross and the Magellanic Clouds need no gear at all, just a dark, moonless night and eyes that have had half an hour to adjust; everything on this list is for going further than that, not for seeing the reserve's headline sights in the first place.