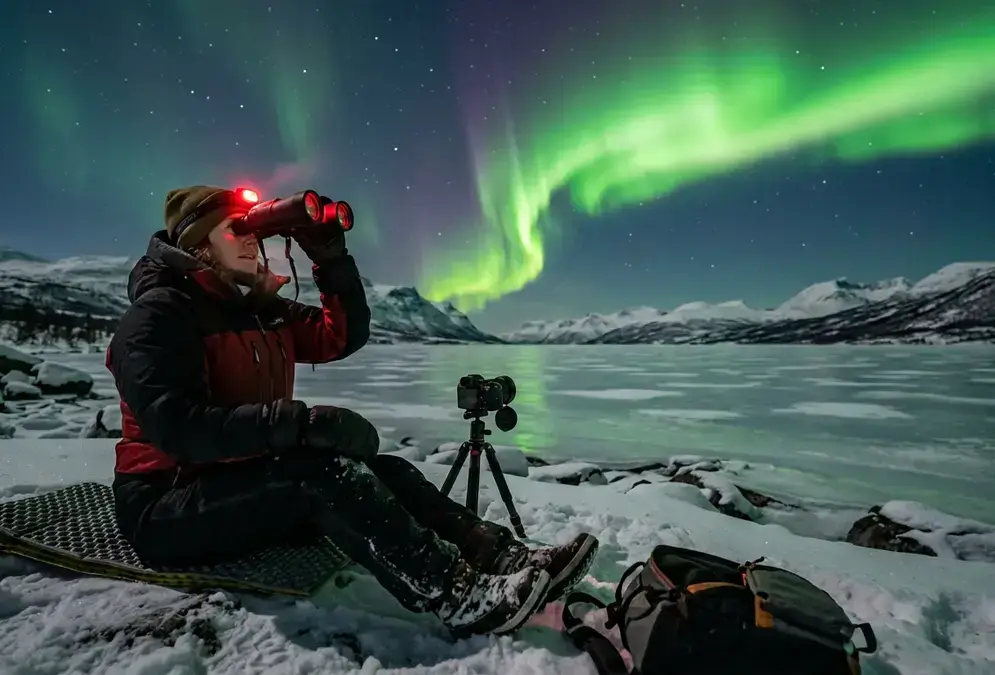

Abisko's cold is real, but it isn't Fairbanks-extreme
Abisko sits inside the Arctic Circle in Swedish Lapland, and the nights you'll spend waiting for aurora here are genuinely cold. But say "arctic packing list" to anyone who has researched a Fairbanks trip and they'll picture -40°F wind chill and frostbite windows measured in single-digit minutes. That's not the cold you're dressing for in Abisko.
Abisko's average January minimum runs around -11.6°C (11.1°F)[1]. Kiruna, the transport hub an hour east where most flights land, averages -7°C (19°F) for daytime highs and -15°C (5°F) for overnight lows across the same month[2]. That's a real, biting cold, but it sits a full climate category away from the continental extremes further north and west in interior Alaska, where clear winter nights regularly drop below -30°F to -40°F.
-11.6°C
The reason is geography, not luck. Abisko has a subarctic climate (Dfc), and counterintuitively it runs milder than Kiruna's own winters despite sitting deeper into the mountains, because mild Gulf Stream air pushing in off the Norwegian coast moderates the worst of the continental cold before it reaches Lake Torneträsk[3].
None of this makes the packing list optional. You'll still stand outside for 2 to 4 hours on the clearest, calmest nights, the same conditions that drop temperatures fastest, waiting for the sky to do something. This list assumes your Abisko Stargazing dates and transport are already sorted (see Getting to Abisko if not), and this month-by-month timing guide if you're still choosing your season. What follows covers what you actually need for the vigil itself: dress for a genuinely cold subarctic night, not a polar-expedition kit built for a colder place.
The three-layer system for a multi-hour aurora vigil
Standing outside for hours in sub-zero air is a different problem than walking or skiing through it. You generate almost no body heat once you stop moving, so the clothing system carries the whole job. Three layers, each doing something specific, beat one heavy coat every time.
Base layer: moisture-wicking material against the skin, never cotton. Cotton absorbs sweat and holds it there, and once it's wet it stops insulating and starts pulling heat away from you instead[4]. Merino wool is the standard recommendation for this layer because it manages moisture without losing its warmth when damp, though a synthetic wicking fabric works too if merino isn't already in your kit.
Mid layer: this is where you build actual warmth. A fleece or wool sweater over the base layer, then an insulated jacket over that, down or synthetic fill depending on how much moisture exposure you expect on the walk out to your viewing spot.
Outer layer: windproof and, ideally, water-resistant. Abisko's cold is dry more often than wet, but wind off Lake Torneträsk cuts through an unlined shell fast. A parka with a real hood and a drawcord waist matters more here than a high waterproof rating.
| Layer | What to wear | Job it does |
|---|---|---|
| Base | Midweight merino wool or synthetic wicking fabric | Moves sweat off skin, never cotton |
| Mid | Fleece or wool sweater, then an insulated down or synthetic jacket | Traps warm air close to the body |
| Outer | Windproof, water-resistant parka with a full hood | Blocks wind off Lake Torneträsk |
Layer for the walk out to your viewing spot, not just the standing-still part. Sweat from an overdressed ten-minute walk through snow lingers in your base layer for the rest of the vigil, and that's exactly the moisture problem the base-layer choice above is meant to prevent. If you're based at this national-park lodge, the chairlift up to Aurora Sky Station covers most of the elevation gain for you, but the open viewing terrace near the summit is more wind-exposed than the valley floor, so the outer layer matters even more once you're up there.
Boots and hands: the two-glove system that saves your fingers
Fingers and toes go numb long before your torso feels cold, because they're farthest from your core and carry almost no thermal mass of their own. This is where an underprepared packing list actually fails a trip.
Boots rated for arctic travel should handle at least -20°F (-29°C) or colder, with roughly 400 grams of Thinsulate-equivalent insulation or better[5]. That's a genuine margin below the temperatures Abisko typically sees, which is the point: boots rated exactly to the air temperature you expect leave no buffer for standing on snow for hours, and wind off the lake can knock the effective cold you feel well below the thermometer reading.
Featured · Destination
Abisko Stargazing
Abisko's rain-shadow microclimate keeps skies clear when nearby Arctic spots cloud over. Aurora season, the Sky Station, ICEHOTEL, and getting there by train.
Gloves are where most aurora photographers get it wrong, because a single thick glove that keeps your hands warm also makes it nearly impossible to operate a camera's dial and buttons. The fix used by aurora photographers from Norway to Alaska is a two-glove system[6]:
- A thin, synthetic inner glove, ideally touchscreen-compatible, for actually adjusting camera settings
- A thick, insulated, waterproof outer mitten or ski glove, worn between shots and pulled back on the second you're done adjusting focus
- A spare pair of each, since a wet inner glove stops being useful fast
Keep the inner gloves on under the mittens whenever your hands aren't on the camera. Bare-skin fumbling with cold metal dials costs feeling in your fingertips fast, and it's avoidable.
For your head: a hat that actually covers your ears, not just the crown of your skull, plus a neck gaiter or scarf you can pull up over your nose and mouth when the wind picks up.
Keeping your camera alive through the cold
Camera batteries hate cold weather more than you do. Lithium-ion cells lose capacity as they chill, and in genuinely cold conditions a battery that would normally last an evening can drain in well under an hour[7]. Carry at least two spare batteries per camera body for any serious aurora session, and keep the spares in an inner pocket, close to your body, not in your camera bag where they'll match the outside air temperature.
Don't trust your battery meter to be honest about what's left. A cold-soaked battery can read as nearly dead, then recover some charge once it warms back up. That's normal lithium-ion behavior in the cold, not a faulty battery, so don't discard a "dead" battery until you've kept it in a warm pocket for a while to let it recover.
Recommended tours
Tours are selected for quality, not commission. I earn a small fee if you book — at no extra cost to you.




When a battery does go cold and sluggish, warm it slowly against your body, not next to a car heater, a chemical hand-warmer packet, or any direct heat source. Lithium-ion cells that warm too fast can swell, leak, or in rare cases become a genuine safety hazard[8]. Patience matters more here than it sounds like it should.
The other cold-weather camera problem hits you on the way back indoors, not outside. Moving a cold camera body straight into a heated room fogs the lens and can drive moisture into the sensor and electronics. Before you head inside, seal your camera in an airtight bag, a simple ziplock works fine, so condensation forms on the bag's outer surface instead of on your gear, then let it warm to room temperature slowly before you open the bag[9].
This is a packing list, not a full camera-gear guide, but two habits carry most of the benefit: warm spares in an inner pocket, and a sealed bag for the walk indoors. Your phone will drain faster in the cold too, so keep it in an inner pocket between shots rather than a coat pocket exposed to the air.
The Abisko arctic night packing list
Pull this list together before you fly, not after you land. Abisko village has limited shopping, and Kiruna, an hour away, is your best bet for anything you forgot.
Read next · Article
Stargazing Gear for Beginners: Binoculars to Telescopes
New to stargazing gear? This guide breaks down binoculars, telescopes, and smart telescopes, so you know what to buy first and what to skip for right now.
Clothing:
- Midweight merino wool or synthetic base layer, top and bottom (pack two sets)
- Fleece or wool mid layer
- Insulated down or synthetic jacket
- Windproof, water-resistant outer shell with a full hood
- Insulated snow pants or bib overalls for standing on snow
- Wool or synthetic hiking socks, one thick pair per day plus spares
- Insulated boots rated to at least -20°F (-29°C)
- Thin touchscreen-compatible inner gloves
- Thick insulated mittens or ski gloves
- Warm hat covering the ears, plus a neck gaiter or scarf
Camera and tech:
- At least two spare camera batteries, kept warm in an inner pocket
- A headtorch with a red-light mode, so you don't wreck your night vision or anyone else's
- A sturdy tripod, since cold makes hands shaky and you'll want the stability more than usual
- A large ziplock or dry bag for each camera body, for the walk back indoors
- A portable phone charger, since phones lose charge in the cold too
Extras worth the space in your bag:
- Chemical hand and toe warmer packets
- A thermos for hot tea or coffee during the wait between aurora bursts
- Lip balm and a basic moisturizer; wind and cold dry out skin fast
- A small daypack big enough for all of the above, so you're not carrying loose gear across snow
If you're staying somewhere without laundry access for several nights, pack enough base layers to rotate rather than relying on one damp set drying out overnight in a mountain lodge.
What to leave home, and how many nights to plan for
Skip the things that work for a milder winter but fail here. A wool pea coat or a casual "winter jacket" rated for temperatures above 0°F won't hold up through a multi-hour stationary vigil at -15°C. Leave behind:
- Cotton base layers or cotton-blend thermal underwear
- Casual sneakers or fashion boots without real insulation
- A single pair of thin gloves with no mitten backup
- A camera bag with no way to seal gear against condensation
Pack for the number of nights you'll actually need, not just the number you can afford. How Many Days in Abisko for Northern Lights? makes the case for three nights minimum, five if you want real odds against a run of cloud, and that math matters for packing too: more nights mean repeat wear of the same base layers, so bring enough to rotate rather than counting on one set drying out between sessions.
If you arrive under-equipped, ask at check-in before buying anything new. Some lodges in the Abisko and Kiruna area keep boots or snow pants on hand for guests, and Kiruna's shops carry proper cold-weather gear if you land short. Get the layering system right, carry spare batteries, and keep your gear sealed on the way back indoors. The rest of an Abisko aurora trip, the clear-sky nights, the train ride in, the ICEHOTEL day trip an hour east, is the part that's actually fun to plan.