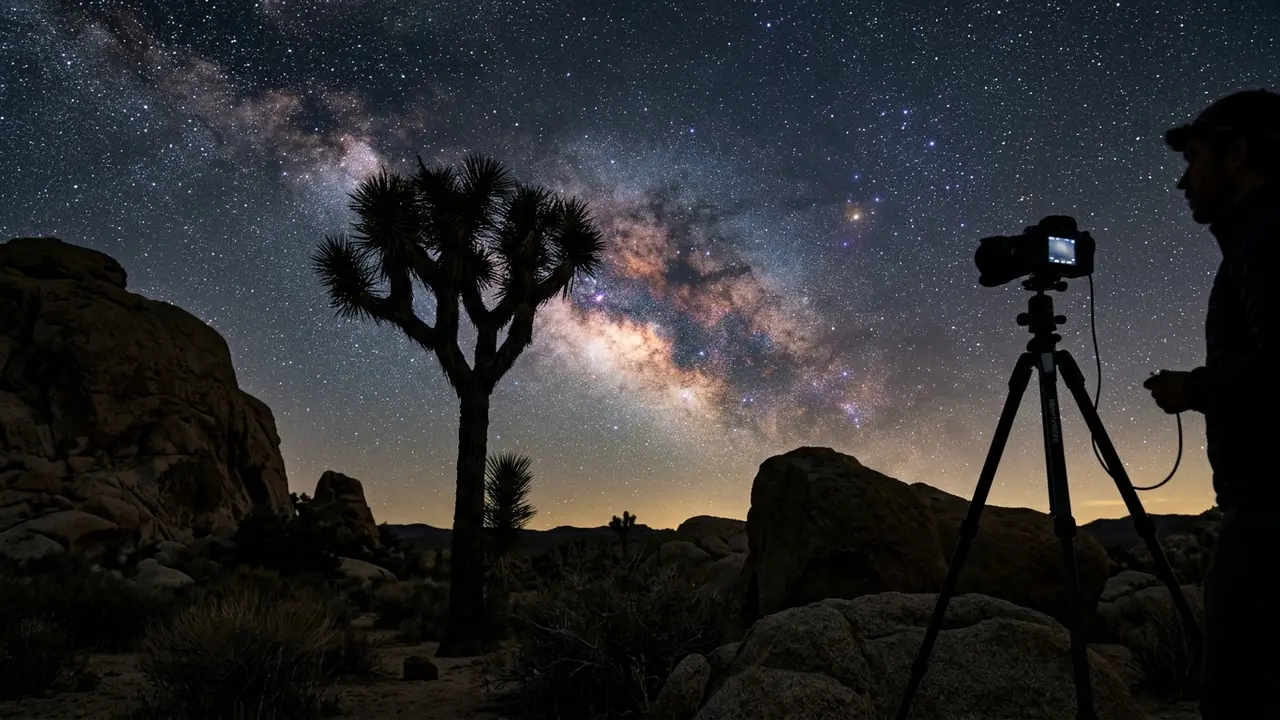

Why Joshua Tree Needs Dedicated Camera Gear
Point a phone at the Milky Way over Joshua Tree's boulder fields and you'll get a smear of gray noise, if the sensor picks up anything at all. A dedicated camera does what a phone cannot: hold a long exposure open at a wide aperture long enough to pull real structure out of a galactic core the naked eye only sees as a hazy band. The park earns that kind of shot. Joshua Tree National Park is rated Bortle Class 2[1], an excellent, very dark rating on the nine-step scale astronomers use to describe sky darkness, and the park also carries International Dark Sky Park recognition from DarkSky International at the Silver tier, one step below the Gold rating a handful of other US national parks hold.
That combination, a genuinely dark sky plus a landscape built from granite boulders and namesake yuccas, is why gear suited to this specific ground can outperform the same camera pointed at a flat, featureless desert floor. A boulder pile or a lone joshua tree silhouette gives a frame something to hold onto besides stars; a flat horizon usually doesn't.
What follows works through camera body and lens choice, the tripod and framing decisions that turn a scatter of boulders and joshua trees into a real foreground rather than a dark smudge at the bottom of the frame, the manual settings and optional star tracker that separate a sharp Milky Way shot from noise, and the desert cold and dew care a long night in this Bortle 2 sky actually demands. For the wider trip-planning picture beyond gear, the stargazing in Joshua Tree National Park hub covers when to go and where to stay. Not ready to invest in a dedicated body and lens? The Joshua Tree smartphone stargazing photography guide covers what's achievable with just the phone already in your pocket.
Camera and Lens: Aperture, ISO, and Shutter for the Milky Way
Aperture is the one spec worth spending real money on. For untracked wide-field shots, the standard approach is a lens near wide open, roughly f/2.8 or wider, paired with an ISO in the 3200 to 6400 range on a full-frame body, and a shutter speed of 10 to 25 seconds, adjusted for focal length and pixel density[2]. A kit lens that tops out at f/4 or f/5.6 will still record the Milky Way on a clear, new-moon night here, just with more visible grain and less shadow detail in the boulder field below it.
Focal length decides how much sky, and how much foreground, lands in the frame. A wide-angle lens in roughly the 14mm to 24mm range on a full-frame body is the common choice for Milky Way landscape work: wide enough to hold both the galactic core and a real chunk of ground, narrow enough that a nearby boulder or joshua tree doesn't bend into a fisheye curve. Crop-sensor bodies should aim narrower to land in about the same field of view.
f/1.4-f/2.8
None of that matters without something worth pointing the lens at. A strong foreground subject turns a plain star field into an actual composition, and Joshua Tree hands you two for free: the park's namesake yuccas, twisted and spiky against the sky, and the granite boulders that pile up across much of the park's open desert. No other stop on this site's roster pairs a Bortle 2 sky with a foreground this recognizable.
Tripod and Composition: Framing Boulders and Joshua Trees
A tripod isn't optional anywhere in Joshua Tree's open desert. A long exposure held open for ten, twenty, thirty seconds turns the smallest wobble, a gust off the valley floor, a hand steadying the legs, a boot scuffing loose sand, into a smear across every star in the frame. Lock every leg and the head down fully before starting a real sequence, and let the park's own wind, which picks up more than most visitors expect after dark, do the testing for you first.
Aluminum legs work fine if that's what you already own, but a carbon fiber tripod stays stiffer against gusts and won't sting bare fingers through a thin glove the way a cold metal leg can on a genuinely chilly desert night. Neither material substitutes for simply locking everything down properly; a cheap tripod set up carefully beats an expensive one left loose.
Composition here is really about choosing which rock, or which tree, earns the center of the frame. Work out the framing in daylight if you can. A boulder pile that looks identical to the eye after dark often reads completely differently in a photograph, depending on which face catches the frame and which one falls into shadow, and a headlamp beam at midnight is a poor substitute for having already scouted the spot. Best stargazing spots in Joshua Tree National Park covers which pullouts and trailheads give a clean sightline to the galactic core without a boulder in the wrong place.
None of this needs to be complicated. A single joshua tree silhouetted against the core, or a boulder stack framing the lower third of the shot, does more work than a wide frame of stars with nothing to anchor the eye.
Featured · Destination
Joshua Tree National Park
Joshua Tree earned International Dark Sky Park status in 2017, just two hours from LA. Here's where to see the Milky Way, dodge crowds, and stay the night.
Manual Settings and the Optional Star Tracker
Once aperture and focal length are set, the rest of the settings fall into place fairly quickly. Start within the ISO 3200 to 6400 range covered above, near wide-open aperture, and a shutter speed of 10 to 25 seconds, then adjust depending on how bright the sky actually looks on the rear screen.
Two habits matter more than any single number on the dial. Shoot RAW, not JPEG, so the shadow and color detail in the boulder field survives editing afterward; a compressed file discards that information before you're home. And switch to manual focus locked at true infinity before the first frame. Autofocus hunts uselessly in near-total darkness, and a lens's marked infinity point is rarely exact, so zoom in on a bright star on the rear screen and turn the focus ring by hand until it collapses to a sharp point rather than a soft blob.
Shutter speed has a practical ceiling before stars stop looking like points of light and start streaking into short trails, a limit that gets tighter the wider your focal length runs. In practice, most untracked Milky Way frames here land in that same 10 to 25 second window rather than pushing past it.
Recommended tours
Tours are selected for quality, not commission. I earn a small fee if you book — at no extra cost to you.




An intervalometer, or a camera's built-in interval-shooting mode, automates a sequence of exposures and removes the small vibration of a finger pressing the shutter by hand[3]. It's a small accessory that matters more than its size suggests once you're shooting a stack of frames to blend or reduce noise later.
A star tracker is the one piece of gear on this list that's genuinely optional. A basic tracker follows the sky's rotation and lets a camera hold a much longer exposure than any tripod alone can manage before stars start trailing, which means a lower ISO and a cleaner final file. It adds setup time, a polar-alignment step, and one more thing to carry across sandy ground, so it's worth adding on a second or third trip rather than a first one. The trade-off in plain terms:
| Setup | Typical exposure limit | Trade-off |
|---|---|---|
| Untracked (tripod only) | 10-25 seconds before trailing | Simple, no extra gear, more frames to stack for lower noise |
| Basic star tracker | Several minutes per frame | Sharper core detail and lower ISO, but adds polar alignment and setup time |
Desert Cold, Dew, and Night Vision: Keeping Gear Working After Dark
Night vision matters as much as gear here. The National Park Service specifically advises turning a regular flashlight into a red light by covering it with red cellophane, tape, or fabric to preserve night vision while stargazing[4], and the same advice holds for anyone setting up a camera: a white headlamp beam near your rig, or a neighboring photographer's, ruins ten or fifteen minutes of dark adaptation instantly. A cheap red-light mode or a red gel taped over a standard headlamp does the job.
Joshua Tree's desert climate means a genuinely wide temperature swing after sunset, warm afternoons giving way to a cold that surprises first-time visitors who packed for the daytime heat. Lithium-ion batteries lose charge faster in cold air, and a battery that reads comfortably full at dusk can drop well before a long night session wraps up. Carry two or three spares and keep them warm against your body, in an inner jacket pocket rather than an outer bag pocket, and swap the active one out once it's noticeably depleted rather than running it to zero in the cold.
Featured · Article
Stargazing Gear for Beginners: Binoculars to Telescopes
New to stargazing gear? This guide breaks down binoculars, telescopes, and smart telescopes, so you know what to buy first and what to skip for right now.
The other desert-night problem is dew, which can form on a lens's front element even somewhere this dry, once the glass cools faster than the surrounding air overnight. A lens heater strap, or a taped-on hand warmer, is the standard fix recommended for astrophotography sessions and keeps the front element just warm enough to stay clear through a long exposure sequence[5]. Check the lens between frames if condensation starts fogging a shot; a quick wipe with a microfiber cloth buys another round of exposures before it fogs again.
Planning a Night Shoot: New Moon Timing, Pinto Basin, and a Checklist
Gear alone doesn't guarantee a shot. Best time to stargaze in Joshua Tree National Park covers the seasonal detail, but the short version matters here: the National Park Service recommends checking the moon's phase and rise and set times, since bright moonlight reduces the number of stars visible and a moonless night gives the darkest skies for Milky Way shots[6]. Outside that stretch, the core is still visible but sits lower and rises later, which changes both the shot and how long you'll be standing in the cold waiting for it.
Location matters as much as timing. The National Park Service singles out the Pinto Basin Road stretch between Cholla Cactus Garden and Cottonwood as having the least traffic and darkest skies of any road in the park[7], and roadside pullouts anywhere require staying within 20 feet (6 meters) of the vehicle. That restriction shapes composition as much as any lens choice: a tripod set up at a Pinto Basin pullout works within a fixed radius, not a free wander across open desert.
A planning app removes most of the guesswork before you ever drive out. Apps that model the Milky Way's position and the moon's phase for a specific date and location let you check, from home, whether the core will actually clear the horizon before you've made the drive to a pullout after dark. Pairing that with a straightforward weather forecast for cloud cover finishes the planning most first-time visitors skip.
A basic kit checklist covers most of what a first Joshua Tree night shoot needs:
- A mirrorless or DSLR body with manual mode, set to shoot RAW
- A fast wide-angle lens, roughly f/2.8 or wider, in the 14-24mm range
- A sturdy tripod, locked down against desert wind
- An intervalometer or built-in interval timer for longer sequences
- Two or three spare batteries, kept warm against your body
- A headlamp with a red-light mode, to protect your own night vision and everyone else's
- A lens heater strap or a taped hand warmer, against dew
If you're building a kit from nothing rather than adapting one you already own, stargazing gear for beginners covers the tiers below a dedicated camera, worth knowing before deciding a full astrophotography setup is what this trip actually needs. And whatever ends up in the bag, staying at one of the lodges near Joshua Tree stargazing close to the park entrance means a cold camera doesn't need a long drive before it can come in out of the cold.