
Camera body: what Jasper's latitude does to your shooting season
Jasper National Park sits at roughly 53°N[5], noticeably farther north than Tenerife's Teide (28°N) or the Atacama's high desert (23°S). That extra latitude changes two things before you even open the camera bag: how low the galactic core climbs above the southern horizon, and how many hours of true astronomical darkness you actually get to shoot in.
53°N
Around the summer solstice, the sun never drops far enough below the horizon at this latitude for the sky to reach full astronomical darkness. It stalls in a shallow twilight all night instead of turning properly black. The practical effect: the best astrophotography windows fall in the shoulder months, late April through May and again in August through September, when nights are long enough to go fully dark but the weather hasn't turned into deep winter. Peak summer (June, July) gives you long, mild evenings and a sky that never quite finishes going dark.
That compressed season is why camera body choice matters more here than in a desert cluster with a dark sky year-round. A body with clean high-ISO output, a native ceiling of at least ISO 6400 and minimal banding in the shadows, buys you usable frames during the marginal weeks either side of peak season, when you might get only a couple of hours of genuine astronomical darkness rather than a full night. A full-frame sensor gathers more light per pixel than an APS-C sensor at the same ISO: the difference between a Milky Way frame that holds up in post and one that falls apart the moment you push the shadows.
APS-C bodies work too; they ask more of you. Expect to shoot roughly a stop higher in ISO to compensate for the smaller sensor, and lean harder on noise reduction afterward. Either way, manual exposure and manual focus are non-negotiable — autofocus and aperture-priority do nothing useful under a Jasper night sky. For the broader beginner kit (binoculars, apps, general night gear), see Stargazing Gear for Beginners; this piece stays camera-specific.
Lens: framing the Rockies without cropping out the arch
A wide-angle lens in the 14 to 24mm range, with an aperture of f/2.8 or faster, is the baseline for Jasper Milky Way work, no different from any other dark-sky destination in that respect. What is different is what you're trying to fit in the frame alongside the sky.
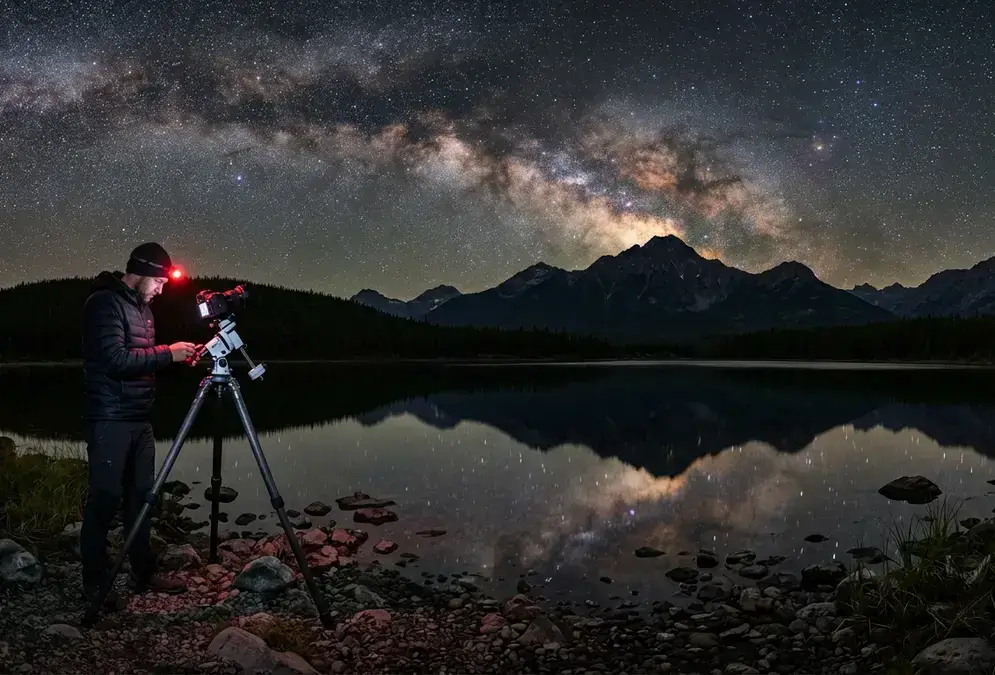
At Pyramid Lake or Pyramid Island, you're shooting toward the water on a calm night, holding the Milky Way and Pyramid Mountain's silhouette in the same frame as their reflection. That composition wants the widest end of your range: a 14 to 16mm focal length keeps enough sky above the horizon line and enough lake below it that the reflection reads as a reflection, not an afterthought at the bottom of the frame. At Mount Edith Cavell or Old Fort Point, where the goal is a single recognisable peak anchoring the lower third of the frame, something closer to 20 to 24mm holds the mountain at a scale that still reads clearly without dwarfing the sky above it.
The 500 Rule sets the ceiling on exposure time before star trailing becomes visible: divide 500 by your focal length in millimetres for a rough maximum number of seconds[1]. At 14mm, that's roughly 35 seconds; at 24mm, roughly 20 seconds. The wider and faster your glass, the more room you have to keep ISO down while still holding the exposure long enough to pull detail out of the Milky Way's dust lanes. For the full exposure-triangle settings behind that shortcut, see How to Photograph the Milky Way.
Coma (the optical aberration that turns pinpoint stars into small comet-shaped smears toward the corners of the frame) matters more on Jasper's lake-reflection shots than on a plain sky-only composition, because the corners of the frame are doing real work: they hold the far edge of Pyramid Mountain or the shoreline detail the reflection depends on. A lens that's genuinely sharp at f/2.8 across the frame, not just in the centre, earns its keep here. Cheaper zooms tend to smear stars into blobs in the outer third of the frame; a well-corrected wide prime in the same aperture range usually does not.
Tripod: standing steady against lake breeze and Parkway wind
Long exposures need a completely still camera, and Jasper gives you two different kinds of wind to fight. At Pyramid Lake, the problem is often barely perceptible: enough breeze to put ripples across the reflection you're trying to hold still, or enough vibration transmitted up through the tripod legs to blur a 20-second exposure. Along the Icefields Parkway pullouts near Athabasca Glacier, the problem is more straightforward: open ground and funnelling valley wind that never really lets up after dark.
A carbon-fibre travel tripod, rated well above the combined weight of your camera and lens, is the baseline. Carbon fibre damps vibration meaningfully faster than aluminium[2], a genuine advantage when a gust catches the tripod mid-exposure rather than before you start the shot. Keep the centre column fully retracted; raising it for extra height turns a stable three-legged platform into a wobbly monopod, exactly when you need it steadiest.
For the reflection shots specifically: position one leg facing into any breeze, and hang a weighted bag from the centre column hook for extra ballast. Arrive well before your planned shot and give the lake ten or fifteen minutes to settle after a passing boat's wake or a gust dies down. A mirror-still reflection takes patience, not gear. On the Parkway, the opposite problem applies: there's no lake to settle, just steady wind, so budget for a sturdier tripod and a shorter list of compositions you actually attempt in one session rather than repositioning every few minutes.
A mirror-still reflection takes patience, not gear.
Remote shutter and intervalometer: hands off the camera for star trails
Touching the shutter button by hand introduces enough vibration to blur a multi-second exposure, which is why a remote shutter release or intervalometer belongs in every Jasper astrophotography bag, regardless of camera brand. Most mirrorless bodies now support this through a phone app too, a reasonable backup if the physical remote's battery dies mid-session.
The intervalometer earns its keep beyond just avoiding shutter shake. A star-trail sequence over Athabasca Glacier, 100 or more consecutive exposures of 20 to 30 seconds each, stacked afterward into circular or streaking trails, needs a device that will keep firing the shutter unattended for an hour or more while you stay warm in the car. Point the camera roughly north for tight concentric arcs around the celestial pole, or south toward the ice field for trails that streak rather than circle.
Recommended tours
Tours are selected for quality, not commission. I earn a small fee if you book — at no extra cost to you.




Built-in intervalometer functions exist on some camera bodies, but a dedicated external unit is worth the modest cost if yours does not: cheap ones run to a small fraction of the price of a lens filter, and the alternative is standing at the tripod pressing a button every 25 seconds for an hour in the cold. Set the interval a second or two longer than your exposure time, so the shutter has time to fully close and reopen between frames without gaps in the eventual trail composite.
If you're shooting alongside other visitors at a popular pullout, keep the camera's rear screen and any indicator lights dimmed between frames. See Dark Sky Etiquette for the full rundown on courtesy at shared viewpoints.
Batteries and moderate mountain cold: not arctic, but enough to slow you down
Jasper's overnight cold is a different animal from Fairbanks or Tromsø. You're not fighting deep Arctic lows here; a clear night in the shoulder seasons typically dips a few degrees either side of freezing at elevation, colder in a hard winter cold snap. That's mild by Arctic standards, but it's still enough to measurably shorten battery life, and enough for condensation to become the more common problem than frostbite.
Cold slows the chemical reactions inside a battery, temporarily reducing the charge it can deliver even though the battery itself isn't damaged[3]. Bring at least two or three spare batteries, and keep the ones you're not using in an inside jacket pocket rather than the camera bag. When the in-camera battery starts reading low, swap in a warm spare; the cold one often recovers some capacity once it warms back up in your pocket.
Dew and frost forming on the front lens element is the more Jasper-specific problem, especially near water. Pyramid Lake and Patricia Lake both push moisture into the night air, and a lens that starts the session at ambient temperature will fog from the inside out as the glass cools further. A battery-powered lens dew heater band, wrapped around the barrel just behind the front element, keeps the glass a few degrees above the dew point for the whole session. Adhesive hand warmers strapped on with an elastic band do the same job cheaper, if less precisely.
The other failure mode is moving gear between temperatures too fast. Carrying a cold camera bag straight into a warm lodge room, or a warm bag straight into cold night air, condenses moisture on and inside the equipment either way[4]. Seal the bag before you go indoors, and let it warm up gradually with the zip closed rather than opening it the moment you're inside. If you're staying somewhere with planetarium or telescope access on-site, like this Jasper lakeside lodge, that short walk back from Lac Beauvert is exactly the kind of temperature jump this rule is written for.
Read next · Lodge
Fairmont Jasper Park Lodge
Fairmont Jasper Park Lodge hosts the Jasper Planetarium on its own Lac Beauvert grounds: dome shows, telescope tours, and a two-year rain-check guarantee.
Where to point the lens: three Rockies compositions worth building a night around
Three locations do most of the work in a Jasper astrophotography trip, and each rewards a different setup.
- Pyramid Lake / Pyramid Island: shoot toward the water on a still night for a mirror reflection of the Milky Way and Pyramid Mountain's silhouette. Wide focal length (14 to 16mm), low ISO base, and the longest exposure your lens and the 500 Rule allow. Arrive early enough to let any wind or boat wake fully settle before you start; a rippled reflection isn't a fixable problem in post.
- Athabasca Glacier / Icefields Parkway pullouts: use the glacier's pale ice and the roadside pullouts themselves as a leading-line or scale foreground under the galactic core. The open sightlines here, with nothing but ice field between you and the horizon, make it easier to frame the Milky Way's full arch without light pollution from passing traffic. Worth knowing before you plan the shot: the ice has been retreating measurably year over year, so the foreground you frame today won't match a photo from a decade ago.
- Mount Edith Cavell / Old Fort Point: put a recognisable peak silhouette in the lower third of the frame and expose for the sky above it. A 20 to 24mm focal length holds the mountain at a scale that reads clearly without the peak swallowing the frame. This is the shot that reads as distinctly Rockies rather than the flat-horizon Milky Way compositions common in desert or aurora-cluster gear guides.
| Location | Best focal length | Foreground challenge | Best conditions |
|---|---|---|---|
| Pyramid Lake / Pyramid Island | 14–16mm | Still water for a clean reflection | Calm, windless night; arrive early to let ripples settle |
| Athabasca Glacier / Icefields Parkway | 14–20mm | Open sightline, minimal foreground detail | Clear night, away from passing headlights |
| Mount Edith Cavell / Old Fort Point | 20–24mm | Peak silhouette needs correct scale | New moon, core well clear of the ridge |
One last framing note: because Jasper sits far enough north for the aurora to show up occasionally, especially during active solar periods, you may catch a faint band of green or red on the horizon at any of these three spots. Treat it as a bonus in the frame, not the reason you set up the shot — the Milky Way and the Rockies foreground stay the headline composition here, the way they do throughout this cluster. If it does put on a show, How to Photograph the Northern Lights covers the settings difference between shooting aurora and shooting the Milky Way.