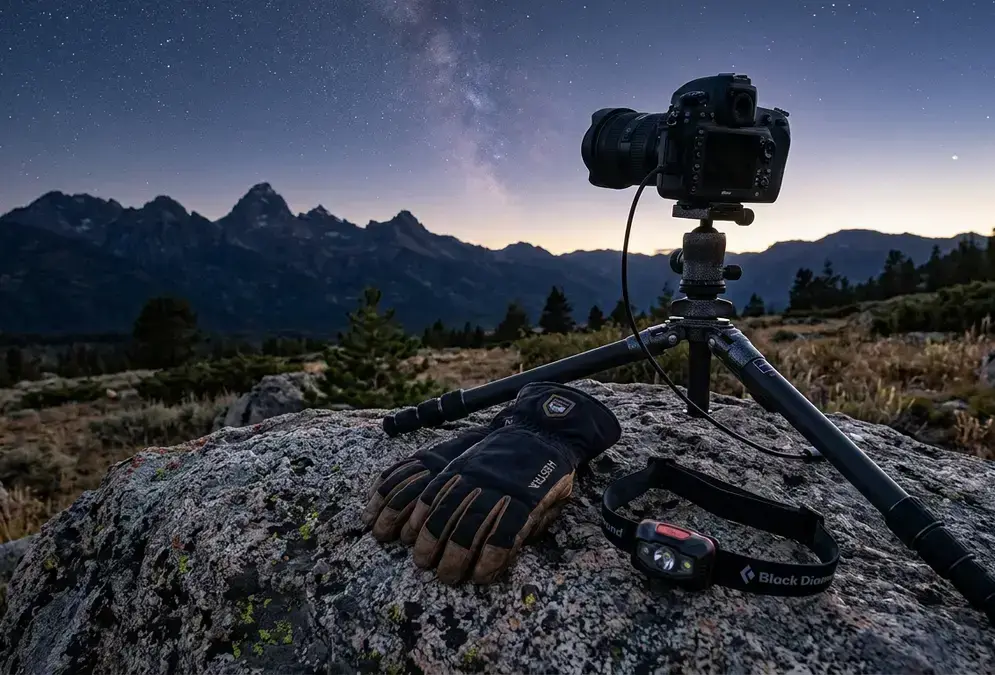

What Jasper's moderate mountain-cold actually demands from your kit
Jasper National Park sits deep in the Canadian Rockies, and once the sun drops behind the peaks, the temperature at an exposed viewpoint falls fast. That's real cold. Show up in a hoodie and a light jacket and you'll be cutting your session short well before the Milky Way clears the ridgeline. But it isn't Arctic cold, and packing like it is means hauling gear you'll never use.
The confusion around Jasper gear usually comes from applying the wrong reference point. Pack like you're headed to an aurora tour in Tromsø or Fairbanks and you'll be needlessly bulky, sweating on the walk from the car and overheating the moment you stop moving. Pack like a mild evening at home and your feet go numb an hour into the session. The right reference point falls in between: a cold, clear night in the Rockies foothills, well below freezing after dark but nowhere near the sustained sub-zero extremes that define an Arctic winter.
| Cluster | Night cold | What matters most | Skip this |
|---|---|---|---|
| Jasper (Canadian Rockies) | Below freezing after dark, moderate mountain cold | Three-layer system, a stable tripod, red headlamp, bear spray | Expedition-rated parkas and mittens |
| Arctic aurora (Tromsø, Fairbanks) | Deep sub-zero, wind chill a genuine hazard | Expedition mittens, insulated boots, chemical warmers | Ultralight or mild-climate gear |
| Alpine New Zealand (Aoraki) | High-altitude alpine chill, changeable mountain weather | Waterproof shells, layers for sudden weather shifts | Desert sun gear |
| Namibian desert (NamibRand) | Hot days, a sharp drop after sunset | Sun protection by day, a mid-layer for the night | Heavy winter parkas |
| Canary Islands (Tenerife) | Mild, rarely near freezing even at altitude | A light fleece and windbreaker | Down parkas and expedition mittens |
That comparison also tells you what to leave home. If you already own Arctic-rated gear, the kind covered in How to Dress for Arctic Winter in Tromsø, most of it still works here, you'll just be overdressed on a mild September evening. If your only cold-weather kit came from a mild-climate trip like the one covered in Tenerife Stargazing Gear, you need a genuine insulating mid-layer here, not just a windbreaker.
Elevation adds a small compounding factor. Jasper townsite sits low in a river valley, but many of the best stargazing pulls, Pyramid Lake, Old Fort Point, the pullouts along the Icefields Parkway, sit higher and more exposed to wind than the valley floor. None of that changes what's on the packing list, but it's worth building a margin into your layering rather than dressing for the townsite forecast alone.
Layering for a night that gets colder than you think
Cold-weather astronomy clubs have logged the same pattern for decades: dress as though the temperature is ten degrees colder than the forecast, because standing still for two or three hours erases the body heat that walking would otherwise generate.[1] Apply that rule to a clear night at a Jasper viewpoint, and a forecast that felt comfortable at the trailhead will feel noticeably colder an hour into a stationary session. Overdressing costs you nothing; underdressing ends the session early.
Overdressing costs you nothing; underdressing ends the session early.
Three layers do the job:
- Base layer — moisture-wicking merino wool or synthetic thermal top and bottom. Skip cotton entirely; it holds sweat against your skin and speeds up heat loss the moment you stop moving.
- Insulating mid-layer — a fleece or a packable down or synthetic jacket that traps warm air. This is the layer you'll actually adjust through the evening as the temperature keeps dropping.
- Wind/water-resistant outer shell — even on a dry night, wind moving down off the surrounding peaks strips heat fast. A shell blocks that wind penetration in a way a mid-layer alone can't.
None of this needs to be expedition-grade. A packable down jacket and a basic rain shell, the kind most people already own for a rainy hiking trip, cover the mid and outer layers. The one place worth spending a little more is the base layer: merino wool regulates temperature and resists odour far better than a cheap synthetic thermal set, and you'll likely wear it on more than one night of the trip. For the fundamentals of building a kit from scratch, stargazing gear for beginners covers binoculars and optics in more depth than this list does.
Hands, feet, and standing still on frozen ground
Ground contact drains heat faster than air temperature ever will. Standing on cold, sometimes frozen ground for a two- or three-hour observing session is one of the most common reasons people pack up early, and it has nothing to do with how many layers are on their torso.
For your hands, loose-fitting gloves or mittens with a flip-top or fingerless panel let you adjust a tripod head or a camera dial without exposing bare skin to the cold for more than a few seconds. For your feet, insulated boots and wool socks matter more than any jacket. Pack for it properly:
- Insulated gloves or mittens with a flip-top or fingerless panel for fine motor tasks
- Insulated winter boots, broken in before the trip, not fresh out of the box
- Wool hiking socks — again, no cotton
- A foam pad or thin closed-cell mat to stand or kneel on at the viewpoint, a cheap add that keeps cold from creeping up through your boot soles
None of this is Jasper-specific advice so much as it's advice most stargazing packing lists skip entirely, focused as they are on jackets and headlamps. The ground does more damage to your comfort than the air ever will.
If you're combining a stargazing night with an Icefields Parkway drive earlier that day, pack a second pair of dry socks. Wet socks from an afternoon hike are the fastest way to end an evening session early. No jacket fixes cold, damp feet.
Keeping your gear working through the cold
Cold affects your equipment as much as it affects you. Metal tripod legs can turn brittle and slippery in freezing temperatures; look for a tripod rated for cold-weather use with rubberized grips and leg locks that won't seize, and avoid extending it to full height on icy ground where a gust or an unbalanced camera can send the whole rig over.
Featured · Destination
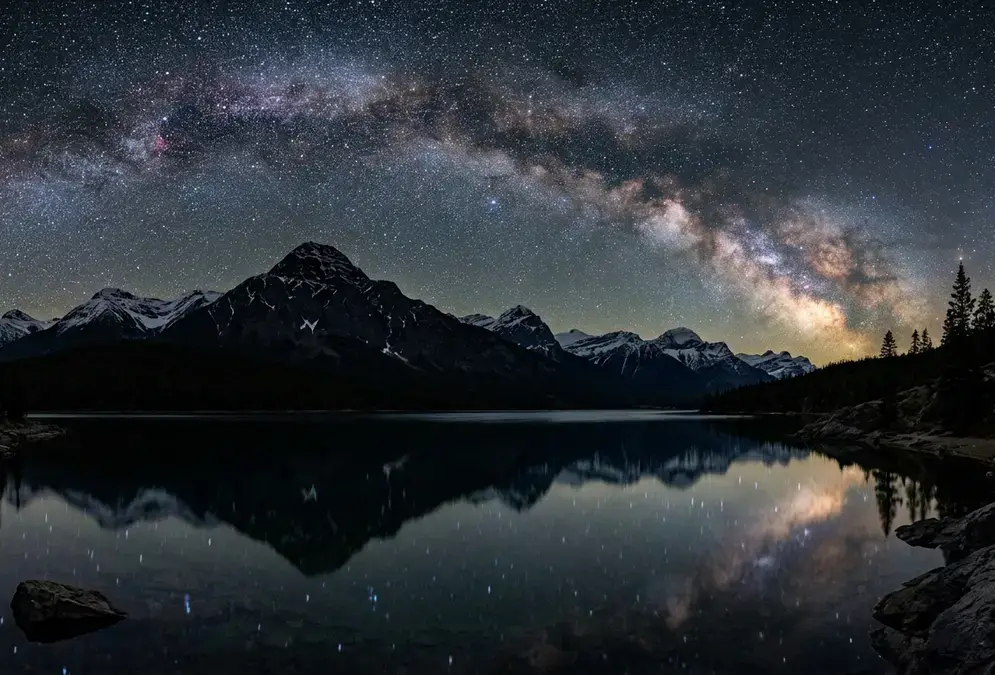
Stargazing in Jasper National Park
Jasper National Park is widely called the largest accessible Dark Sky Preserve in Canada: 11,228 km², an October Dark Sky Festival, and a 38-seat planetarium.
Batteries are the other casualty. Cold drains battery performance in headlamps, cameras, and phones noticeably faster than at room temperature, and a dead headlamp an hour into a session in bear country is a genuine problem, not just an inconvenience.[2] Carry spares, and keep them in an inner jacket pocket rather than a cold camera bag, since body heat keeps them closer to their rated capacity.
Recommended tours
Tours are selected for quality, not commission. I earn a small fee if you book — at no extra cost to you.




A USB-rechargeable headlamp, charged at your lodge before each session, holds up better than a set of disposable batteries left in a cold pack all day. The same logic applies to a portable battery bank for your phone or camera: charge it inside, use it outside.
One more cold-weather quirk worth planning for: bringing a cold camera or lens indoors after a session causes condensation to form on and inside the equipment as it warms up. Sealing gear in a zip-lock or dry bag before bringing it in, then letting it warm up gradually while still sealed, keeps moisture off the optics. If you're staying at this Lac Beauvert lodge, charging gear between sessions is as simple as walking back to your room between the planetarium's dome show and a walk to the shoreline.
Red light, dark adaptation, and the headlamp that actually matters
Dark adaptation is the process by which your eyes shift from daytime cone vision to the far more light-sensitive rod vision used at night. It takes roughly twenty to thirty minutes to fully develop, and a single glance at a bright white phone screen or a car's headlights resets it instantly.[3] On a group stargazing walk, one person checking a white screen can undo the whole group's night vision at once.
20-30 min
A dedicated red headlamp solves this because human rod cells are barely sensitive to the red end of the spectrum. A genuine astronomy-friendly red light sits in the roughly 620 to 670 nanometre range, dimmed down to roughly four to five lumens.[4] The critical spec isn't just "has a red mode," it's how dim that mode goes. A bright red light still partially disrupts adaptation, just less than white light does.
You don't need a specialised astronomy torch. Any headlamp with a genuine dimmable red-only mode, not just a red plastic cover over a white LED, works fine for reading a star chart or adjusting a tripod knob. Some dedicated astronomy headlamps dim down below a single lumen for exactly this reason, which is worth the extra cost if you're serious about maximising what you can see.[5]
Red light apps as a backup
A phone app with a genuine red-light or night mode works as a backup to a physical headlamp, useful for checking a star chart without carrying a second device, but treat it as a backup only. A headlamp keeps your hands free for a tripod or a hot drink, which a phone in your palm never will.
Bear safety for a night stargazing walk in Jasper
None of the gear above matters if you handle the walk to and from your viewpoint carelessly. Jasper National Park is bear country, and Parks Canada's standard guidance for any dusk or night activity, stargazing included, starts with group size: travel in a tight group of four or more, since a larger group significantly reduces the chance of a serious encounter.[6]
Carry bear spray, holstered and immediately accessible, not buried at the bottom of a pack, and know how to deploy it before you need to. Buy it once you've arrived in Jasper or Edmonton rather than trying to pack it; it's a pressurized aerosol canister and generally can't travel with you in carry-on or checked luggage. Make noise on the walk, talking normally is enough, and skip the bear bell: Parks Canada considers them largely ineffective at actually alerting a bear to your presence.[7]
Stick to established trails or designated viewing areas rather than bushwhacking to a spot you found on a map. Bears are most active around dawn and dusk rather than the middle of the night, so plan your arrival and departure times with that window in mind, and always tell someone your route and expected return time before you head out.[8]