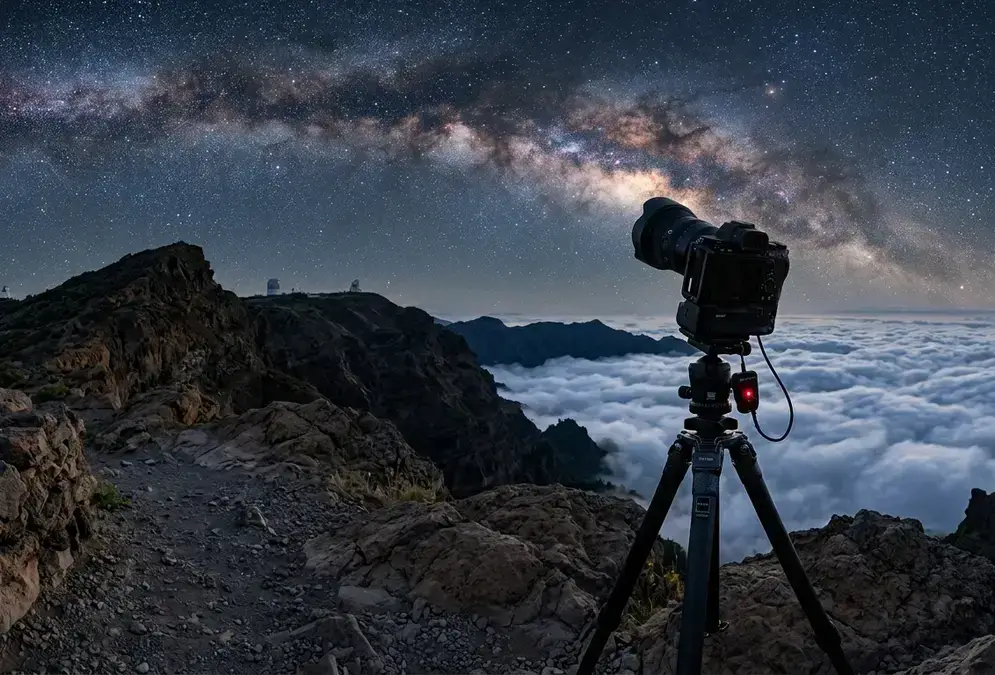

Camera body: any camera with manual mode works, and La Palma's sky does some of the work for you
You do not need a five-figure astro rig to bring home a real Milky Way frame on La Palma. Any interchangeable-lens camera that lets you set aperture, shutter speed, and ISO independently gets you there: a used Sony A6000, a Canon Rebel, a Nikon Z-series body from the last decade. What matters more than the body itself is the sky above it, and at La Palma's darkest sites the sky measures Bortle Class 1-2, among the lowest ratings measured anywhere on Earth[1].
Bortle 1-2
That darkness changes what the camera has to do. A Bortle 1-2 sky delivers a usable signal to a sensor at ISO 1600 to 3200 that a suburban Bortle 5 sky can only extract at ISO 6400 or higher, if it extracts it at all through the skyglow. An APS-C crop-sensor body under this sky produces a genuinely usable Milky Way frame, because the sky is doing the work that a bigger sensor would otherwise be compensating for. This is the single biggest reason not to buy a new camera body before this trip: the upgrade that matters most here is the destination, not the gear.
Full-frame still has an edge, and if you already own one, bring it. A Sony A7 III or Nikon Z6 II, roughly 24 megapixels with clean high-ISO output, holds more shadow detail in the galactic core's dust lanes than a crop body at the same settings. But that edge is smaller under La Palma's sky than it is under a merely dark suburban one, and it's not a reason to spend before a trip to La Palma Stargazing. Megapixel count above roughly 24 MP buys you nothing for astro work either: larger individual photosites gather more light per pixel over the same exposure time than a denser sensor crammed with more of them, which runs opposite to what most camera marketing optimises for.
What to avoid: full-frame bodies from before around 2015. The Canon 5D Mark II and the original Nikon D700 both show horizontal banding noise at ISO 3200 that's difficult to remove without smearing the fine detail in the Milky Way's dust lanes. Spend the difference on a newer generation body instead, or skip the upgrade entirely and let the sky do the work.
Lens: a wide, fast lens for the Milky Way arch over the Caldera
The lens decision is simpler than the camera decision: go wide and go fast. 14mm to 24mm at f/2.8 or faster covers both the full galactic arch and tighter core-detail work, and under La Palma's Bortle 1-2 sky, a fast prime earns its place more than almost anywhere else in the Canary Islands.
The Samyang (Rokinon) 14mm f/2.8 is the budget standard for a reason: relatively inexpensive on the used market, sharp wide open, and wide enough to frame the full Milky Way arch with the Caldera de Taburiente's rim as foreground. Pair it with a body at ISO 3200: La Palma sits at roughly 28.7°N, almost the same latitude as Tenerife (28.3°N)[6], so the galactic core reaches a near-identical altitude above the horizon on both islands, and the same rough exposure math applies — start around 20 seconds at 14mm and check the frame at 100% for star trailing before committing to a longer exposure.
For core-detail shots, a 24mm f/1.4 prime, the Sigma Art version is the common choice, resolves the Rho Ophiuchi complex and the dust lanes with more contrast than any zoom at the same focal length. A zoom lens at f/2.8, the kind that's excellent for daytime landscape work, shows visible coma, star points smearing into small comet-shaped blobs, across the outer third of the frame; a well-corrected prime shows almost none.
| Lens | Aperture | Used price | Best for on La Palma |
|---|---|---|---|
| Samyang (Rokinon) 14mm f/2.8 | f/2.8 | ~€300 | Full arch over the Caldera de Taburiente |
| Sigma 24mm f/1.4 Art | f/1.4 | ~€800 | Core detail, Rho Ophiuchi |
| Tamron 15-30mm f/2.8 | f/2.8 | ~€600 | Arch with framing flexibility |
| 24-70mm f/2.8 zoom (any brand) | f/2.8 | ~€1200-1500 | Skip for astro: strong daytime lens, visible coma at night |
Manual focus is not optional with either lens. Autofocus hunts in near-total darkness and often lands slightly past true infinity. Use live view zoomed to 10x on the brightest star in the frame, turn the ring until it collapses to a tight point, then leave it alone for the rest of the session.
Tripod: the ridge wind punishes a lightweight travel tripod
A tripod rated for a living-room floor is not a tripod for the wind along the Roque de los Muchachos ridge. Much of La Palma's best-known astrophotography ground sits close to that ridge, at altitude, where wind is close to constant, and a lightweight aluminium travel tripod with the centre column extended vibrates at exactly the frequency that turns a 20-second exposure into a soft double image. You won't see it on the camera's LCD; you'll see it on the laptop the next morning.
A carbon-fibre tripod rated for at least 8 kg of payload is the practical minimum. Carbon fibre damps vibration roughly three times faster than aluminium: tap a carbon leg and the ring dies out in a fraction of the time an aluminium leg takes. Three-section legs beat four-section for rigidity, at the cost of a longer packed length, and that trade-off is worth making for a night on the ridge.
Keep the centre column fully retracted. Raising it converts a stable three-legged platform into a wobbly monopod; if you need more height, spread the legs wider rather than extending the column. Spiked feet grip the loose volcanic gravel and bare lava around the ridge and the Caldera rim far better than rubber feet do, which mostly just slide on the loose surface.
Featured · Destination
La Palma Stargazing
La Palma stargazing guide: the world's first Starlight Reserve since 2012, Bortle 1-2 skies above Roque de los Muchachos, plus where to stay and go year-round.
Budget and mid-range options that pass the test: the Sirui AM-284 (carbon fibre, affordable on the used market) and the Benro Mach3 TMA28C (a mid-range new price, twist locks that don't seize in the cold). Neither is exotic; both hold a 20-second exposure steady in conditions that would ruin the shot on a cheap department-store tripod.
Remote shutter, intervalometer, and the manual-focus technique that actually works in the dark
Two accessories prevent the two most common technical failures on a La Palma night session, and neither came bundled with the camera. A remote shutter release, or the camera's built-in 2-second self-timer if you don't own one, eliminates the shake from pressing the shutter button with a finger. On a 20-second exposure, that half-second of finger-induced vibration shows up as a soft edge on every bright star in the frame.
An intervalometer matters if you plan to shoot longer than your camera's built-in timer allows, typically capped at 30 seconds, or if you want a star-trail sequence of 100-plus consecutive frames. A basic wired model costs well under fifty euros and plugs into the same remote port every mirrorless and DSLR body has, and once it's set it runs the whole sequence unattended.
Recommended tours
Tours are selected for quality, not commission. I earn a small fee if you book — at no extra cost to you.




Manual focus is the technique that separates a sharp frame from a soft one, and it has nothing to do with which lens you bought. Switch the lens to manual, zoom the live-view display to 10x on the brightest star in the frame, and turn the focus ring until that star collapses to a tight point rather than a fuzzy blob. Tape the ring down once it's sharp; a gloved hand brushing it in the dark is enough to knock focus out. Do this once per session, at the start, before your eyes have fully adapted, because the live-view screen is bright enough to cost you 20 to 30 minutes of dark adaptation if you keep returning to it[8].
Read next · Article
Stargazing Gear for Beginners: Binoculars to Telescopes
New to stargazing gear? This guide breaks down binoculars, telescopes, and smart telescopes, so you know what to buy first and what to skip for right now.
Cold drains batteries faster than the spec sheet promises. At altitude after midnight, expect roughly a third fewer shots per charge than the manufacturer's room-temperature rating. Bring two spares and keep them in an inside jacket pocket, where body heat slows the voltage drop, and swap in a warm battery when the cold one dies rather than waiting for it to recover. For the full exposure-triangle breakdown, the How to Photograph the Milky Way guide covers shutter speed, ISO, and the NPF rule in more depth than this article's La Palma-specific focus allows.
La Palma-specific compositions: the Caldera rim, the observatory ridge, and the sea of clouds
Three compositions are specific enough to La Palma that they're worth planning around rather than improvising on the night.
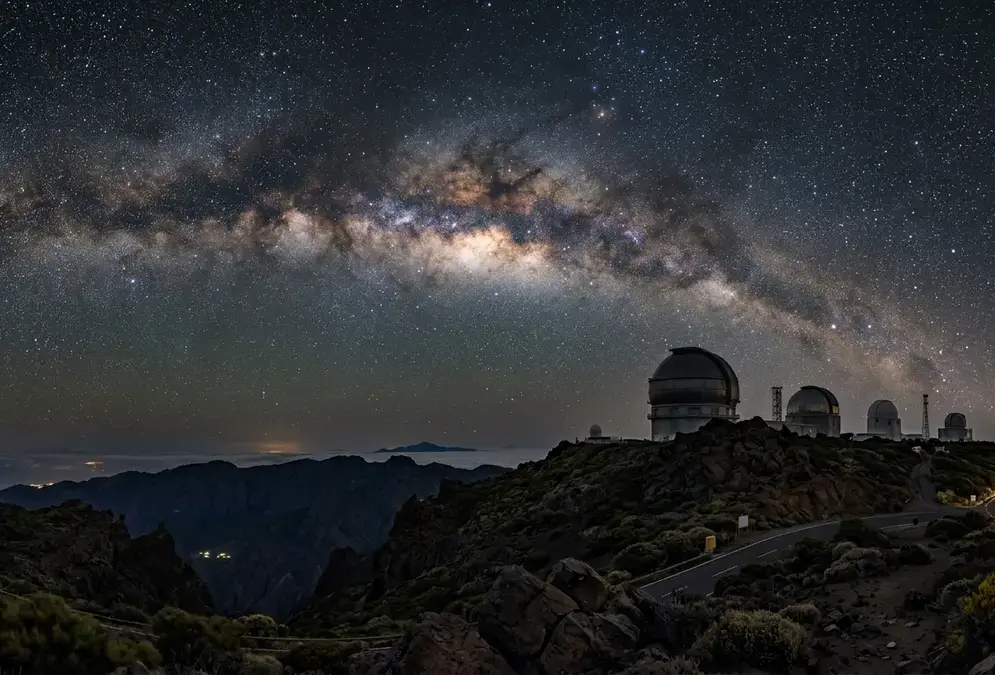
- The Milky Way arch over the Caldera de Taburiente rim. Shoot wide, at 14mm, from a viewpoint along the ridge road, with the caldera's black volcanic silhouette as foreground and the galactic core rising above it. The Best Stargazing Spots in La Palma guide covers the named viewpoints, including the alternative observation points below the Roque de los Muchachos barrier, where this shot works best.
- The observatory ridge exterior, not the domes themselves. Roque de los Muchachos Observatory, home to the Gran Telescopio Canarias, a 10.4-metre primary mirror confirmed as the world's largest single-aperture optical/infrared telescope[9], is a day-visit-only site. Guided visits run roughly 90 to 110 minutes[5] at around €20 for adults[10], and the gates close to the public after dark specifically so vehicle lights and stray illumination don't interfere with live observation runs. What you're photographing at night is the ridge and the domes' silhouettes from outside the barrier, never the interior of a working telescope, and never after the gate closes.
- The cloud-inversion "sea of clouds" shot. The same Atlantic trade-wind cloud layer that keeps the observatory's sky clear does the visual work here: a dark, flat blanket of cloud sitting hundreds of metres below your composition, with the Milky Way overhead and nothing between you and it. This shot works best from any viewpoint that sits above the inversion layer, which typically runs lower in summer and higher in winter, so check the current cloud-top altitude before you commit to a specific spot for the night.
None of these three shots requires special permission. The Caldera and the ridge road up to the observatory barrier are open to anyone with a rental car, a red headlamp, and a tripod.
AstroLaPalma's Nightscapes tour, and the honest bottom line
Be straight with yourself before you build a two-lens kit for this trip: La Palma does not have the astrophotography tour industry or camera-rental market that Tenerife, or Chile's Atacama Desert, have built up over years of heavier tourism traffic. The island's population runs to roughly 84,000, against Tenerife's roughly 964,000[6], and that gap shows up directly in how few dedicated camera-workshop operators exist here.
What does exist, and is confirmed bookable, is AstroLaPalma's Photo Tour: Nightscapes, a €49-per-person session departing Los Cancajos that folds photography coaching into a night that also includes telescope viewing[7]. It's the right call if you want someone checking your settings and framing before you're alone in the dark with a tripod and a hunch, and the La Palma Astrophotography Tour page covers what's confirmed about the session and what still needs confirming directly with the operator.
If a pure camera-only masterclass is specifically what you're after, bring your own kit and treat the guided session as a coaching supplement rather than the whole plan, or compare it against the more specialised Astrophotography Gear for Teide setup if your trip includes both islands.
A Bortle 1-2 sky above the Caldera de Taburiente does more for a beginner's Milky Way frame than another thousand euros of camera body ever will.
The sky quality is what closes the gap the tour market leaves open. A Bortle 1-2 sky above the Caldera de Taburiente does more for a beginner's Milky Way frame than another thousand euros of camera body ever will. Bring the kit in this article, not the kit built for a place with more infrastructure, and the results hold up regardless.