
Camera body: high-ISO performance is the only spec that matters at 28°N

Teide's latitude introduces a subtle but real advantage for camera selection. At 28° North, galactic core altitude tops out around 30 to 35 degrees above the southern horizon[2]. Targets at that declination move more slowly across the sensor than targets near the celestial equator, which means a 24mm lens on a full-frame body can safely hold a 20 to 25-second exposure before star trails become visible[3], a few seconds longer than the standard 500 Rule suggests for equatorial targets.
That extra couple of seconds matters because it directly reduces the ISO you need. On a full-frame body with good high-ISO noise performance, you can shoot at ISO 3200 where an APS-C body at the same focal length would need ISO 6400. The difference is visible in the shadow detail of the dust lanes and the smoothness of the sky background. Some of that noise floor comes from dark current, electrons the sensor generates from its own heat rather than from starlight, which is why sensor cooling and in-camera dark-frame subtraction matter almost as much as raw ISO gain on a warm caldera night. This is why the camera body matters more on Teide than the lens does: a body with clean ISO 6400 output lets you shoot faster, which freezes stars sharper, which means your foreground-blending in post starts from a cleaner base.
Full-frame is not mandatory, but it is the difference between a Milky Way shot that holds up at print size and one that falls apart the moment you push the shadows. A used Sony A7 III or Nikon Z6 II with roughly 24 megapixels and genuinely clean ISO 6400 costs under EUR 1,200 second-hand in 2026 and will outperform a brand-new APS-C body costing the same. If you already own an APS-C body (a Canon R10 or Sony a6400, for instance), pair it with the fastest wide-angle lens you can afford and accept that you will shoot at ISO 6400, not 3200. The results are still good; the noise floor is just higher.

7.1–7.5

Naked-eye limiting magnitude at Teide's Bortle 2 caldera[^1], per the **Bortle scale**. Inner-city skies (Bortle 9) resolve only to roughly magnitude 4.0; suburban skies (Bortle 4–5) sit closer to magnitude 5.5–6.5. The gain is not linear: each magnitude step is roughly 2.5 times fainter, so the jump from a suburban backyard to Teide's Bortle 2 sky lets you see stars several times dimmer than at sea level. Your camera sensor sees that gain the same way your eye does, which is why ISO 3200 at Bortle 2 looks cleaner than ISO 1600 at Bortle 5.
The spec that does not matter: megapixels above about 24 MP. A 24-megapixel sensor with large photodiodes and low read noise gives you cleaner astro frames than a 45-megapixel sensor with smaller photosites, because the larger individual pixels collect more light per pixel in the same exposure time. This is the inverse of what landscape photographers usually optimise for, and it is the single most common body-misunderstanding among first-time astrophotographers on Teide.
What you must avoid: older full-frame bodies (pre-2015) that look like a bargain on the used market but produce banding noise at ISO 3200. The Canon 5D Mark II and original Nikon D700 are both full-frame but their high-ISO noise patterns include horizontal banding that is difficult to remove in post without smearing fine detail in the dust lanes. Spend the extra EUR 200 for a generation newer. For the full exposure-triangle settings once you have the right body, the How to Photograph the Milky Way guide covers shutter speed, ISO, and the NPF rule calculation that replaces the 500 Rule on modern sensors.

Lens: why a fast wide-angle prime slaughters a zoom on Teide

The lens decision on Teide boils down to two categories: a 14mm f/2.8 for the full Milky Way arch at Roques de García, and a 24mm f/1.4 for core detail work. Both are primes. Both are manual-focus. Both cost a fraction of what a comparable zoom would, and both are sharper at f/2.8 than any zoom ever made.
The reason a prime wins on Teide specifically is the coma correction at the frame edges[4]. Coma is the optical aberration that turns point sources (stars) into little comet-shaped smears in the corners of the frame. A zoom lens at f/2.8 typically shows visible coma across the outer third of the frame; a well-designed prime at f/2.8 shows none. On Teide, where you are composing with Roque Cinchado or the caldera wall as foreground, the corners of the frame contain actual star detail that a zoom lens smears into unrecognisable blobs. The Samyang 14mm f/2.8 has some mustache distortion on the horizon line, but its centre and mid-frame sharpness at f/2.8 exceeds lenses costing three times as much, and coma is effectively absent beyond the extreme corners.
The comparison table below lays out the four lenses that earn a place in a Teide bag. Prices are second-hand market estimates as of mid-2026. The two zooms are included for contrast: a 24–70mm f/2.8 is a superb daytime lens, but at night it trails in every column that matters.
LensApertureUsed price500 Rule maxComa at f/2.8Best for on Teide
Samyang 14mm f/2.8f/2.8~€300~35sVery lowFull arch at Roques de García
Sigma 24mm f/1.4 Artf/1.4~€800~20sNegligibleCore detail, Rho Ophiuchi
Tamron 15–30mm f/2.8f/2.8~€600~33sModerate (corners)Arch with framing flexibility
Sony 24–70mm f/2.8 GM IIf/2.8~€1500~20sHigh at 24mmSkip for astro: great daytime lens, poor coma control at night
The Sigma 24mm f/1.4 Art is the best single lens for core detail on Teide, but it is heavy and relatively narrow for full-arch work. The Samyang 14mm f/2.8 is the budget winner: roughly EUR 300 used, sharp enough for large prints, and wide enough to frame the entire arch from Roques de García with the caldera floor below. If you can only bring one lens, bring the 14mm. If you bring two, add the 24mm for the core close-ups.
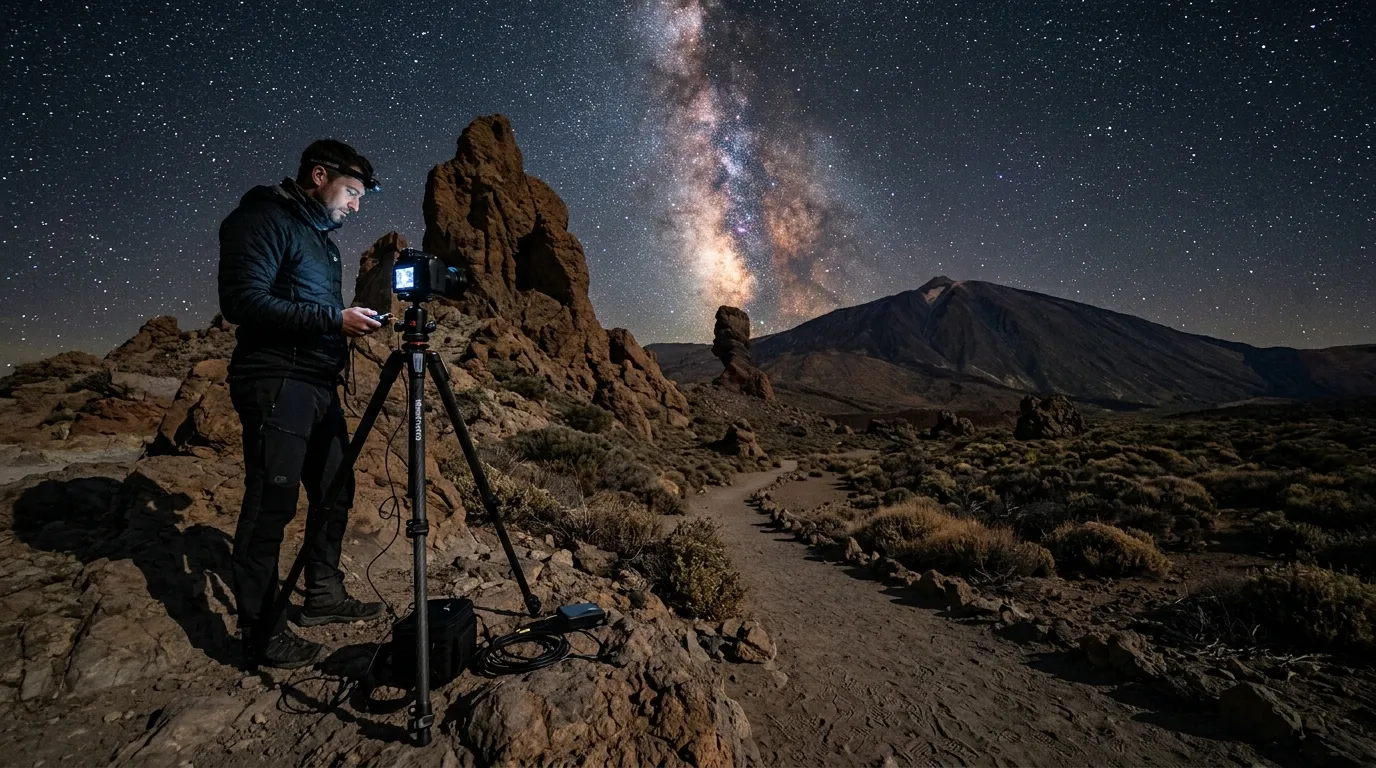
Astrophotography gear for Teide setup with tripod and wide-angle lens under the Milky Way at Roques de García caldera

Astrophotography gear for Teide setup with tripod and wide-angle lens under the Milky Way at Roques de García caldera

Tripod: carbon fibre, 8 kg payload, and the centre column stays down
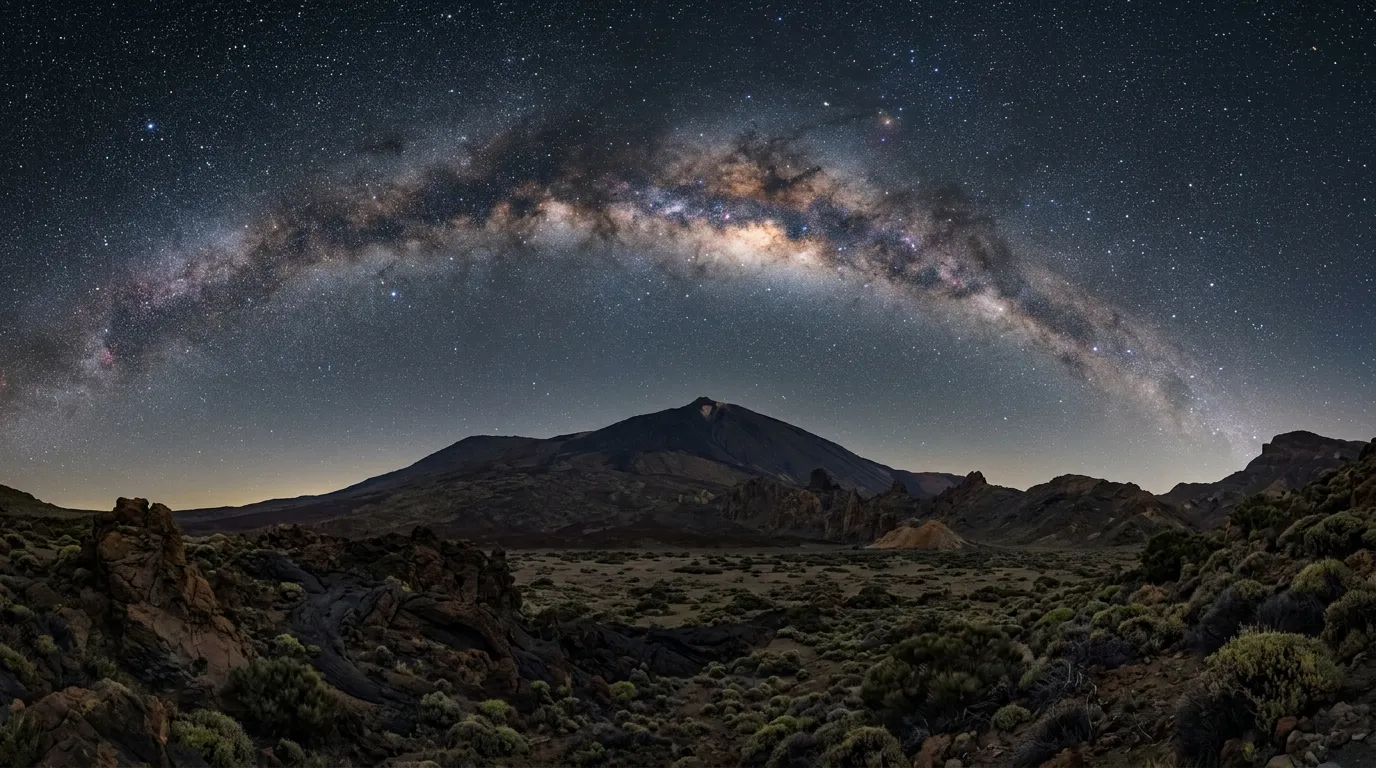
The tripod is where first-timers on Teide save money and lose shots. A lightweight aluminium travel tripod rated for 3 kg, with the centre column extended for extra height, is stable on a living-room floor. On the Teide caldera at night, with a steady wind funneling through the crater, the same tripod vibrates at the exact frequency that turns a 25-second exposure into a double-image smear. You will not see the vibration on the LCD; you will see it on the laptop the next morning.
A carbon-fibre tripod rated for at least 8 kg of payload is the minimum credible option. Carbon fibre damps vibration roughly three times faster than aluminium: tap an aluminium leg and it rings for a second; tap carbon fibre and the vibration dies in a third of that time. On Teide, where gusts push 30 km/h across the caldera floor even on nominally calm nights, that damping matters more than the weight rating itself.
The centre column is the first thing you extend to gain height, and the first thing to lock down and never touch. A raised centre column converts a tripod into a monopod on a wobbly base; the three legs become a tripod again only when the column is fully retracted. At Roques de García, where the composition often puts the camera low to include the rock formations as a foreground silhouette, you will not miss the extra height. If you genuinely need height, buy a tripod with longer leg sections, not one with a column you will raise.
Three-section legs beat four-section legs for stability: fewer joints means fewer points of flex. The trade-off is packed length — a three-section tripod is longer when folded — but the gain in rigidity at full height is worth it on a summit night. Spiked feet are also worth the small extra cost: the caldera surface is a mix of compacted pumice gravel and bare lava, neither of which rubber feet grip reliably. Spikes bite into both.

Featured · Destination

Tenerife Stargazing

Tenerife stargazing guide: Teide National Park's UNESCO Bortle-2 skies, 83 constellations visible. Observatory visits from €21, Parador hotel, and best tours.

Three tripods that pass the Teide test at different price points: the Sirui AM-284 (carbon fibre, 15 kg payload, roughly EUR 250 used) is the budget pick that does not compromise on damping. The Benro Mach3 TMA28C (14 kg payload, twist locks that do not freeze in the cold, roughly EUR 300 new) is the mid-range workhorse. The Gitzo Systematic Series 3 (18 kg payload, roughly EUR 800 used) is overkill for a Sony A7 III with a 14mm lens, but its leg locks are milled from a single block of aluminium and it will outlast your camera bodies. If you are buying once, the Benro is the sweet spot; if you are buying used, the Sirui is hard to beat.

Accessories that earn their weight in a Teide camera bag

Four accessories separate a rough night on the caldera from a productive one, and only one of them came with your camera. The other three cost little and prevent the kind of failure you discover only when you get home.
Intervalometer: your camera's built-in self-timer caps at 30 seconds. For exposures longer than 30 seconds in Bulb mode, or for a star-trail sequence of 120 consecutive 30-second frames, you need an external intervalometer. A basic wired model costs roughly EUR 25 and plugs into the remote port on every DSLR and mirrorless body. Set it to 120 shots at 25 seconds each with a 2-second interval between frames, and you have a one-hour star-trail composite that costs no attention during the shoot. Without one, you stand next to the tripod pressing the shutter for an hour in the cold.
Batteries: the cold on Teide kills batteries faster than the published specs suggest. At 10°C after midnight on the caldera floor, a mirrorless battery that delivers 600 shots at room temperature gives you about 350 to 400. In winter, at 2°C, expect closer to 250. Bring three fully charged batteries and keep the two spares in an inside jacket pocket where body warmth slows the voltage drop. The battery in the camera will die first; swap it with a warm spare and the cold one will recover some charge once warmed up again.
Red headlamp: any light source with a red LED, but not one that cycles through white modes before reaching red. A headlamp that turns on in white light, even for half a second, resets your dark adaptation by roughly 20 minutes. The Petzl Tikka runs white and red off the same multi-function button rather than a separate red-only switch, but learn the hold-to-jump sequence in its manual and you can start straight in red without cycling through white first; any headlamp with a true dedicated red switch solves the problem even more reliably. Do not use a phone screen as a red light: phone screens leak blue-spectrum light at every brightness setting, and the one time you unlock the phone to check Stellarium and forget to switch back to red mode costs you and everyone around you their night vision.
Lens heater band and cloths: the 15 to 25°C temperature drop from the coast to the caldera is the single most under-planned-for variable in Teide astrophotography. Your lens, cold-soaked from the air-conditioned drive up, hits moist caldera air and condenses water within two minutes of being set up. A USB-powered lens heater band (roughly EUR 15) wrapped around the lens barrel ahead of the front element keeps the glass above the dew point. Plug it into a power bank, turn it on before you mount the lens, and do not turn it off until you pack up. A microfibre cloth (two of them, because the first one will get damp) deals with the viewfinder and the rear LCD, which also fog. A lens blower clears loose volcanic dust from the front element; the caldera is dry and windblown pumice dust clings to glass with static electricity.
What to skip: a star tracker for a first trip. A tracker adds polar-alignment time, extra batteries, and a learning curve that eats into the limited dark hours of a Teide night. Master single-exposure wide-field work first; the Bortle 2 sky is already giving you results a tracker would only marginally improve on wide-angle shots. Stargazing Gear for Beginners covers binoculars, telescopes, and apps for observing sessions; this article keeps to the camera bag.

Shooting sequence: from parking the car to your first keepers

The hour between arrival and your first usable exposure is the one most gear guides skip. On Teide, with the temperature drop, the condensation risk, and the need to move between compositions as the core rises, that hour has a specific shape. Follow it and you shoot productively from the start. Improvise it and you spend half the night troubleshooting.
Arrive at the caldera roughly 90 minutes before astronomical twilight ends. That gives you enough daylight to scout compositions without a headlamp, and enough twilight to shoot your foreground frames at low ISO with clean detail. The timing varies by season: in June, civil twilight ends around 21:30 local time and astronomical twilight around 23:00; in September, both shift roughly an hour earlier.
Timeline
  1. T-90 min

    Arrive and scout

    Park at the caldera site. Scout two compositions on foot while there is still daylight. Note the core-rising direction and foreground alignment.

  2. T-75 min

    Gear acclimatisation

    Leave camera bag open in the car for 10–15 minutes. Gear must reach ambient temperature before setup to prevent lens condensation.

  3. T-60 min

    Tripod setup, rough focus

    Set up during civil twilight. Level tripod, mount camera and heater band, rough-focus at 10x live view on a distant ridge. Switch lens to manual focus.

  4. T-30 min

    Foreground frames

    Shoot foreground at low ISO (100–400) and stopped-down aperture (f/5.6–f/8) during nautical twilight. These frames blend with sky exposures later.

  5. T+0

    Astronomical twilight ends

    Sky is fully dark. Start wide-angle (14mm) exposure sequence while the core is low. ISO 3200–6400, aperture wide open, 20–25 seconds.

  6. T+1 hr

    Switch to 24mm for core detail

    Core above 20° altitude; Rho Ophiuchi complex clear of horizon haze. Recompose for tighter core shots with foreground silhouette.

  7. T+3 hr

    Star trails (optional)

    If you have intervalometer and spare battery. Point north for circular trails or south for the core drifting across the frame.

Once parked, open your camera bag and leave it open in the car for ten to fifteen minutes. The air inside the caldera is 15 to 25°C colder than the coast and your gear needs to reach ambient temperature before it is set up outside. If you take a warm lens straight out of the car into cold air, condensation forms instantly on the glass and stays there for half an hour. While the gear acclimatises, walk the site without a camera: find your foreground, note the direction the core will rise, and pick two compositions rather than one. The second composition is your backup if wind changes or another group sets up in your frame.
Set up the tripod at the first composition during civil twilight. Level it on the pumice; the bubble level in the tripod head is your friend here, because a tilted horizon in a wide-angle Milky Way shot is almost impossible to correct in post without cropping out foreground detail. Mount the camera, attach the lens heater band and power bank, switch the lens to manual focus, and use live view zoomed to 10x on a distant ridgeline to rough-focus before it gets fully dark.
Shoot your foreground frames during nautical twilight, roughly 30 to 45 minutes before astronomical twilight ends. Set ISO 100 to 400, aperture f/5.6 to f/8 for depth of field, and expose for the landscape — the rock formations at Roques de García will be dark but not black, and the sky will still carry a deep blue rather than true black. These frames will be blended with the sky exposures in post.
When astronomical twilight ends and the sky goes fully dark, you have roughly four to six hours of core visibility in June and July — less in the shoulder months. Start with the wide 14mm composition while the core is still relatively low: you capture the full arch with the caldera floor below. Move to the 24mm about an hour in, when the core has climbed above 20 degrees and the Rho Ophiuchi complex sits clear of horizon haze. Shoot until the core starts descending or your batteries die, whichever comes first.

Six ways people ruin their frames on Teide, and how you avoid them

Every astrophotographer who has shot on Teide has a story about the frame that got away. The list below is the six most common failures, drawn from nights on the caldera when the sky was perfect and the results were not. Each has a fix that takes under a minute to apply.
Raising the tripod centre column for extra height. It converts a stable platform into a monopod with three decorative legs. Retract the column fully, lock it, and if you need height, spread the legs wider and accept a slightly lower viewpoint. A 15 cm lower angle with pin-sharp stars beats a higher angle with motion blur you cannot fix in post.
Not disabling in-body image stabilisation on a tripod. IBIS and lens-based stabilisation compensate for handheld shake by moving the sensor or lens elements. On a stationary tripod, the stabilisation system hunts for movement that does not exist and introduces its own micro-blur. Switch it off in the camera menu before you start the session.
Changing lenses in the open caldera wind without a plan. The Las Cañadas caldera is a volcanic bowl: wind, pumice dust, and fine grit. If you must swap lenses, do it inside the car with the doors closed, body facing down, and the rear lens cap in your teeth. Dust on the sensor in a night-sky image shows as dark spots in every frame, and the spots are worst in the sky areas where they are most visible.

Read next · Article

How to Photograph the Milky Way: A Device-by-Device Guide

How to photograph the Milky Way with a smartphone, DSLR, or a smart telescope: galactic-core timing, NPF-rule settings, and honest device-by-device advice.

Using autofocus in the dark. It hunts, it fails, and it resets to infinity-focus which on most modern lenses is slightly past true infinity. Switch to manual focus, use live view at 10x magnification on the brightest star in frame, and adjust until the star is a tight dot. Tape the focus ring down with a strip of gaffer tape once it is sharp; brushing the ring with a gloved hand in the dark is enough to knock it out.
Shooting JPEG instead of RAW. A JPEG throws away shadow detail that a RAW file keeps. On Teide, the shadow detail is where the dust lanes and the faint outer band of the Milky Way live. If your camera offers compressed RAW, use it — the file is smaller and the loss is visually undetectable for astro work. The exception: if you are stacking 30 or more frames for noise reduction, compressed RAW is fine; for single-exposure work, uncompressed gives fractionally cleaner shadows.
Arriving with only one fully charged battery. Cold plus long exposures plus live-view use kills a mirrorless battery in roughly two hours. Bring three, keep two warm, and rotate. The warm spare that just came out of your jacket will give you 30% more shots than the cold one you just pulled from the camera. For dates and moon phases, Best Time for Stargazing in Tenerife has the full forecast; the gear can be perfect but a waxing gibbous still washes out every frame.
For the broader Milky Way photography technique, NPF rule calculations, smartphone shooting, smart-telescope options, and post-processing workflows, How to Photograph the Milky Way covers what this article does not. This piece is the Teide-specific gear layer on top of that foundation.



