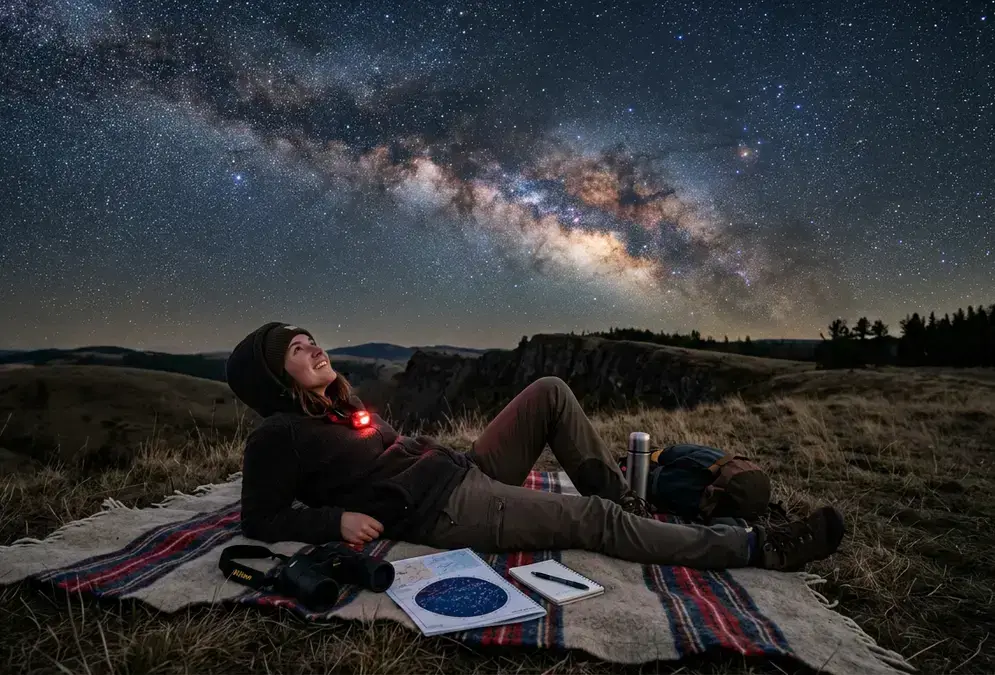

Start with your eyes: how dark adaptation works
Your eyes are the only instrument every beginner already owns, and they need time to switch into night mode before the sky looks the way it's supposed to. You have two kinds of light-sensing cells: cones, clustered at the center of your vision and built for color and daylight detail, and rods, spread across the rest of the retina and built for dim light at the cost of both. Cones adapt to darkness in a few minutes. Rods take much longer.
Give your rods 20 to 30 minutes[1] of uninterrupted darkness before you judge what you can or can't see. That's the real dark-adaptation window, and it's non-negotiable: check your phone at minute fifteen and the clock restarts. Stars invisible at minute five appear at minute twenty-five, not because the sky changed, but because your peripheral vision, where rod cells dominate, finally caught up.
20-30 min
The fix for phone-checking is a red flashlight, or a white one with red cellophane taped over the lens. Red light barely registers with rod cells, so you can read a star chart or find your car keys without losing the adaptation you just spent half an hour earning. White light undoes it instantly, and it costs the full 20 to 30 minutes to earn back.
A simple field test confirms you're there: once adapted, you should be able to make out several faint stars inside the bowl of the Little Dipper, ones invisible to fresh, unadapted eyes even at a decent site. If you can't see them yet, give it another five minutes before blaming the sky.
Find a dark sky: reading the Bortle scale
Where you stand matters more than any single piece of gear you can buy. City light doesn't just add glare, it raises the whole sky's brightness until faint stars and the Milky Way disappear into a gray wash, no matter how dark-adapted your eyes are. That wash comes in four distinct types—sky glow, glare, light trespass, and clutter—and understanding what light pollution is makes it easier to pick a site where none of them interfere. The tool astronomers use to describe the resulting darkness is the Bortle scale.
| Bortle class | What the sky looks like | What you can see |
|---|---|---|
| 1-2 (excellent dark sky) | No sky glow; the Milky Way can cast a faint shadow | Milky Way structure, dim meteors, zodiacal light |
| 4-5 (suburban) | Sky glow near the horizon; washout overhead | Milky Way faintly, bright star clusters, planets |
| 6-7 (bright suburban to urban) | Sky glows orange most of the night | Moon, planets, and the brightest stars only |
| 8-9 (inner city) | Continuous orange-white glow | Moon and the very brightest planets |
The nine Bortle classes
Amateur astronomer John E. Bortle published the scale in the February 2001 issue of Sky & Telescope[2], ranking sky darkness from Class 1, a pristine site dark enough for the Milky Way to cast a faint shadow, to Class 9, an inner-city sky where only the Moon, planets, and a handful of the brightest stars survive the glow[3].
At Class 1 to 3, the Milky Way shows real structure, dust lanes included. At Class 4 to 5, suburban skies still show it, just flatter and lower-contrast. By Class 6 to 7, a dome of orange sky-glow sits on the horizon and the Milky Way fades to faint or invisible. Past Class 8, the sky has given up: streetlights win. Most beginners, even ones who make a real effort, end up observing from somewhere in the Class 4 to 6 range rather than a pristine Class 1 site, and that's still enough sky for a genuinely good first night.
Finding your Bortle class without guessing
You don't have to eyeball this. Light-pollution maps like lightpollutionmap.app overlay Bortle classes on satellite imagery of Earth's night-time lights[4], so you can check your backyard, then check a spot forty minutes down the road, before you drive anywhere. That drive is usually worth it: leaving a mid-sized city and heading 30 to 60 minutes[5] toward open country commonly drops you two or three Bortle classes, the difference between a washed-out sky and a genuinely dark one. For a sense of what a truly world-class sky looks like at the far end of that scale, the best dark sky parks in the world covers sites that need a special trip, not just a short drive out of town.
When to go: moon phase, twilight, and meteor showers
Moon phase decides more about your night than the weather forecast does. A full moon is bright enough to wash out faint stars, dim meteors, and any hint of the Milky Way, even from a dark Bortle 2 site. A new moon does the opposite: no moonlight competing with starlight, so faint objects that vanish on a full-moon night are suddenly there. Planning around this new-moon window is the single highest-leverage thing a beginner can do before ever touching a star chart.
Once you've picked a moonless night, wait for true darkness before judging the sky. Sunset isn't dark enough. Astronomical twilight ends when the sun drops 18 degrees[12] below the horizon, usually 30 to 60 minutes after sunset depending on your latitude and the season. Faint stars and the Milky Way stay washed out until that line passes, no matter how dark-adapted your eyes already are.
Cloud cover matters just as much as moon phase, and it's the variable beginners check last instead of first. A clear-sky forecast for your exact site, not just your nearest city, is worth checking the same day you plan to go; a thin, high haze that looks harmless from a window can flatten contrast on stars you'd otherwise see easily.
Two nights a year need no gear, no planning beyond a clear sky, and no moon: meteor showers. The Perseids peak around August 11 to 13[10], typically producing 50 to 100-plus meteors an hour[10] under a dark sky. The Geminids peak around December 13 to 14[11] and are widely considered the best shower of the year, with rates reaching up to 150 an hour[11] under ideal conditions. Both reward nothing more than a reclining chair, a blanket, and patience: no telescope helps you see a meteor, and a telescope's narrow field of view actively hurts your odds. Some dark-sky destinations build entire itineraries around these two dates: the Atacama Desert pairs an exceptionally dark sky with dry, stable air that keeps meteor counts high on both nights.
- August 11-13
Perseid meteor shower peak
Up to 100 meteors an hour under a dark sky.
- December 13-14
Geminid meteor shower peak
The year's most reliable shower, with rates reaching up to 150 an hour.
What to look at first: the Moon, planets, and constellations
Once your eyes are adapted and you've picked a clear, moonless night at a reasonably dark site, here's what rewards a first look with nothing but your eyes.
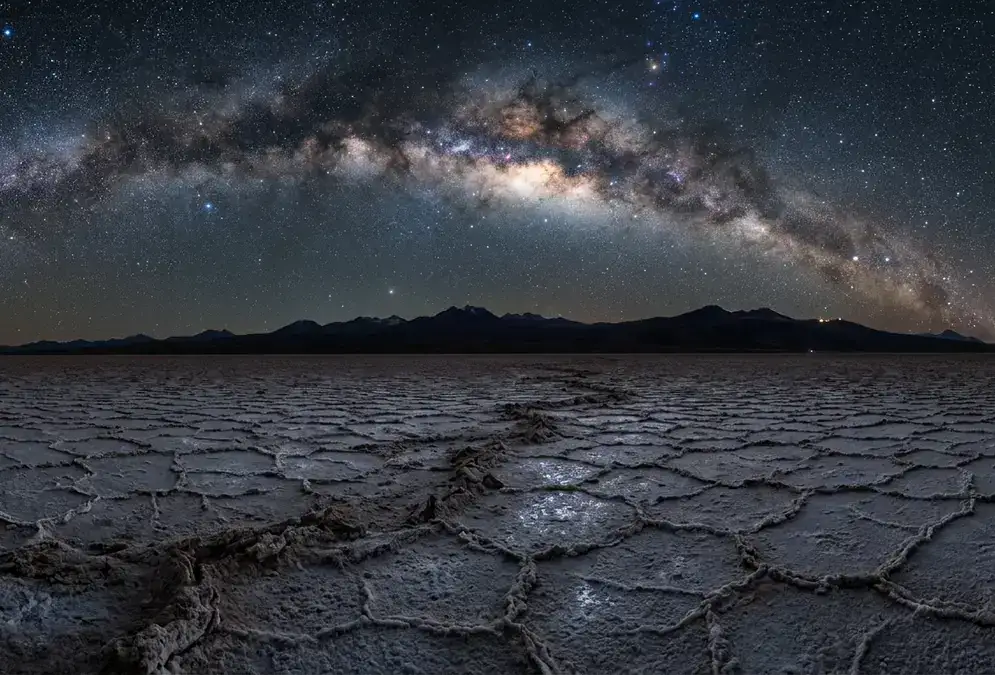
Featured · Destination
Atacama Desert Stargazing
Earth's driest desert delivers Bortle 1–2 skies, 330+ clear nights a year, and the galactic core almost overhead. Guide: tours, lodges, season, getting there.
The Moon: craters along the terminator
The Moon is the one object where a little light helps. Look along the terminator, the shifting line between lit and shadowed lunar surface, on any night between the first and last quarter. Craters throw long shadows right at that line, turning a flat gray disc into a landscape with visible depth, no optical aid required, though even cheap binoculars sharpen it considerably. That also makes a bright, hazy, or partly cloudy night a perfectly good one to spend on the Moon alone, since none of its detail depends on how dark the rest of the sky is.
Planets that don't twinkle
Stars twinkle because their light is a single point punching through miles of turbulent atmosphere. Planets don't, or not noticeably, because they're close enough to show a tiny disc rather than a true point, and that disc averages out the atmospheric wobble. Use that to identify a planet before you check an app: a steady, unflickering point of light is a planet, not a star.
- Venus: the brightest of the four, often visible before full dark
- Jupiter: a steady white glow, the second brightest
- Saturn: a pale, faintly yellow point, and Saturn's October 4 opposition in 2026 puts it closest to Earth that day
- Mars: a dim, distinctly reddish point
Constellations, the ISS, and meteors
Start with whatever's actually up. A compass app, or your phone's built-in one, helps square yourself to north before you start hopping between constellations, especially the first few times out. Orion dominates northern-hemisphere winter skies, anchored by red-giant Betelgeuse and blue-white Rigel on opposite shoulders of its hourglass shape. The Big Dipper, part of Ursa Major, stays visible year-round from most of the northern hemisphere and works as a pointer to nearly everything else. In summer, look for the Summer Triangle: Vega, Deneb, and Altair, three bright stars from three different constellations that anchor the whole summer sky.
Then there's the International Space Station, brighter than any star when it crosses overhead, moving steadily rather than blinking like a plane, visible for a few minutes, up to about six for the best overhead passes, before it slips into Earth's shadow[13]. NASA's Spot the Station tool tracks exactly when it'll cross your sky next[13]. Meteors need nothing at all: no app, no chart, no gear, just dark-adapted eyes pointed up on a clear night.
Your first tool: why binoculars beat a telescope
The single biggest mistake beginners make with money is buying a telescope before they've spent a season with something simpler. A pair of 10x50 binoculars does more for a first year of stargazing than most entry-level telescopes ever will.
Binoculars have no setup, weigh under a kilogram, and give you a real, wide, moving view of the sky within seconds of stepping outside. A telescope needs collimation, a mount that tracks, and a learning curve before it does anything useful; a beginner telescope bought on a whim often ends up in a closet by spring. 7x50 or 10x50 binoculars, the two most common beginner specs, gather far more light than your eye alone, resolve Jupiter's four largest moons as tiny points, sharpen lunar craters along the terminator, and turn the Pleiades from a smudge into a proper star cluster, all without a single moving part to break. That same pair pulls double duty for daytime birdwatching, sports, and travel, so the money never feels wasted even if stargazing turns out to be a passing interest.
Binoculars have no setup, weigh under a kilogram, and give you a real, wide, moving view of the sky within seconds of stepping outside.
Pair binoculars with something that tells you where to point them. Stellarium is a free, offline planetarium program that overlays labels on the real sky your phone's camera sees[9], so you can identify a planet or a constellation in seconds instead of guessing from a book. A planisphere, a battery-free rotating star wheel set to your date and time, does the same job with zero battery to die at the worst moment. And when a telescope eventually does make sense, my guide to the best beginner telescopes is a smarter first purchase than whatever's cheapest at a big-box store.
Technique and the mistakes that ruin a first night
Two techniques separate a frustrating first night from a good one, and neither costs anything. Star-hopping means using a bright, easy-to-find star as a stepping stone to something fainter nearby, following a path star by star instead of scanning the whole sky at random. Point at the two stars forming the outer edge of the Big Dipper's bowl, follow that line away from the bowl, and it lands on Polaris, the North Star: a classic first hop that works from almost anywhere in the northern hemisphere. Averted vision means looking slightly to the side of a faint object rather than straight at it, because your peripheral retina, thick with light-sensitive rod cells, catches dim light your central vision misses entirely. Both take practice. Both work.
Set your expectations before you go, not after. Your eyes will never see the saturated reds and blues of a Hubble image; those come from long exposures, filters, and processing that a human retina simply can't replicate in real time. A nebula through binoculars or a small telescope usually looks like a faint gray smudge, not a photograph, and that's not a failure of your equipment or your eyes. That's what deep-sky objects actually look like to a human observer, full stop. If you eventually want to capture that color yourself rather than just observe it, how to photograph the Milky Way explains how a camera or smart telescope pulls out detail your eyes physically can't.
Most disappointing first nights trace back to the same handful of avoidable mistakes:
Recommended tours
Tours are selected for quality, not commission. I earn a small fee if you book — at no extra cost to you.




- Going out on or near a full moon. No amount of dark-adapting fixes a sky already washed out by moonlight.
- Checking a phone screen mid-session. One glance at a bright white screen erases twenty minutes of dark adaptation.
- Over-magnifying. More zoom on a cheap telescope usually means a dimmer, blurrier image, not a better one; magnification without light-gathering aperture just spreads the same light over a bigger, fainter image.
- Expecting Hubble colors. Real-time human vision is mostly rod-based in dim light, so a faint gray smudge is success, not a broken telescope.
- Skipping the weather and moon check. A clear forecast and a moon-phase calendar take thirty seconds and save an entire wasted trip.
Fix the timing and the technique, and the sky does the rest without you spending a dollar on anything but a red flashlight.