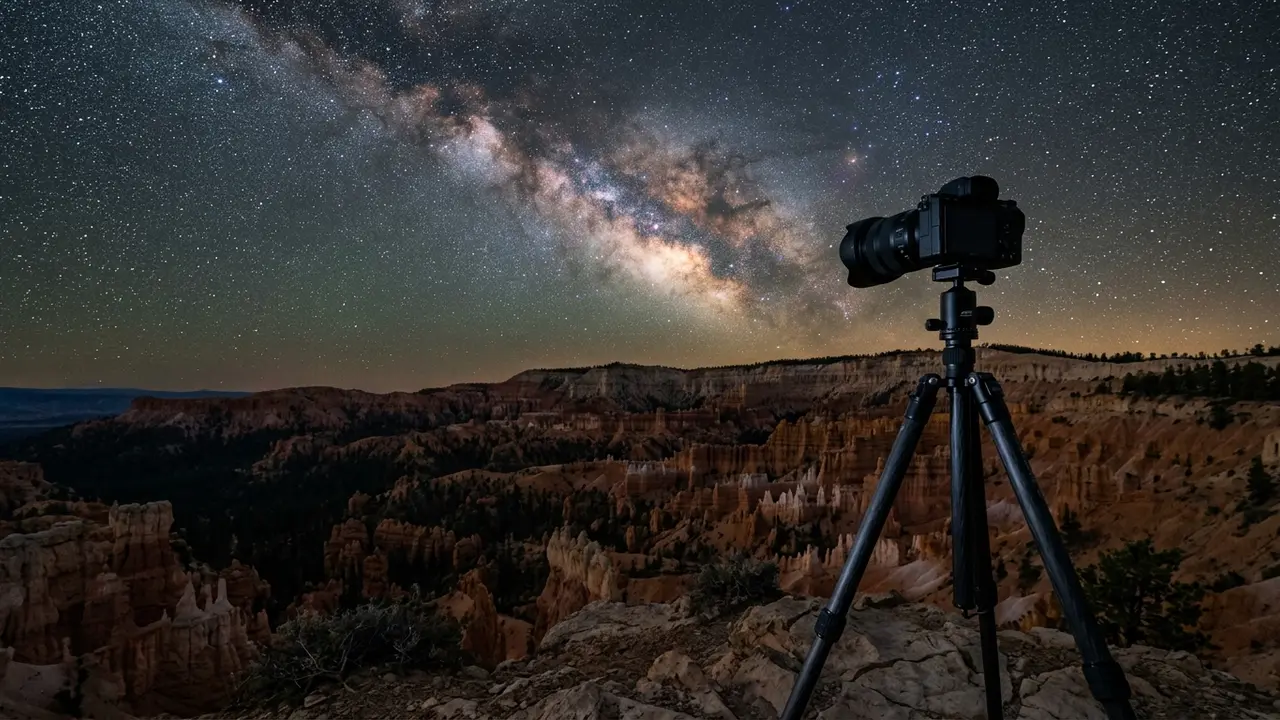

Why Bryce Canyon Needs Dedicated Camera Gear
Point a phone at the Milky Way over Bryce Canyon and you'll usually get a faint gray smudge, if the sensor picks up anything at all. A dedicated camera does something a phone cannot: hold a long exposure open at a wide-enough aperture to pull real structure out of a galaxy core the naked eye sees only as a soft band. If you're shooting on a phone instead, look for the smartphone astrophotography guide for Bryce Canyon; the settings here assume a mirrorless or DSLR body.
The park earns that kind of shot. Bryce Canyon was certified an International Dark Sky Park in 2019[1], and DarkSky International rates it Gold Tier, the top of its three-tier scale. The National Park Service credits the park's high elevation, clean air, and remote location for skies dark enough that, on a clear night with no moon up, visitors can see thousands of stars and the full band of the Milky Way stretching overhead. That combination, thin air scattering less light plus genuine distance from any city glow, is the reason a camera built for this rim can outperform the same gear at sea level.
What follows works through camera body and lens choice, the tripod and framing decisions that turn a hoodoo field into a real foreground rather than a dark smudge at the bottom of the frame, the manual settings that separate a sharp Milky Way shot from noise, and the cold-weather battery care this high, dry rim actually demands. For the wider trip-planning picture beyond gear, the stargazing in Bryce Canyon National Park hub covers when to go and where to stay.
Camera and Lens: Aperture and Focal Length for the Milky Way
Aperture is the one spec worth spending real money on. An aperture of f/2.8, or the widest your lens allows, is the standard recommendation for Milky Way photography[2], since a wider opening pulls in more light without pushing ISO, and the noise that comes with it, any higher than it has to go. A kit lens that tops out at f/4 or f/5.6 will still record the Milky Way on a clear, moonless night at Bryce, just with more visible grain and less shadow detail in the hoodoo field below it.
Focal length decides how much sky, and how much foreground, ends up in the frame. Roughly 14mm to 24mm on a full-frame body is the standard wide-angle range for Milky Way landscape shots[3]. Anything wider starts to bend the hoodoos into a fisheye curve; anything longer crops too much of the galaxy's core out of a frame that, from the rim, often runs from one side of the amphitheater to the other. Crop-sensor bodies should aim narrower to land in roughly the same field of view.
f/2.8
None of that matters without something worth pointing the lens at. A strong foreground subject, rock formations, a lone tree, ruins, turns a plain night-sky frame into a genuine composition rather than a stock photo of stars. Bryce hands you that foreground for free: no other stop on this site's roster has a foreground built from thousands of standing rock spires.
Tripod and Composition: Framing the Hoodoos
A tripod isn't optional at any rim overlook here. A long open shutter means the smallest wobble, wind, a hand on the legs, a passing footstep on the boardwalk, shows up as a smear across every star in the frame. A stable head matters more than an expensive one: lock it down fully, keep the center column low or retracted if the shot allows it, and let the plateau's own wind do the testing for you before a real session.
Aluminum works fine if it's what you already own, but a carbon fiber tripod stays stiffer in cold air and won't sting bare skin through a thin glove the way a frozen metal leg can on a genuinely cold rim night. Neither material matters as much as simply locking the tripod down properly before you start a long exposure.
For the foreground itself, the Queen's Garden and Navajo Loop trails put you closest to Bryce's signature hoodoos after dark, both accessible from the Bryce Amphitheater without a long night hike in the dark. Best stargazing spots in Bryce Canyon covers how those trailheads compare to the rim's four named viewpoints for a tripod setup, including which ones keep a clear sightline to the galaxy's core without a rock spire in the wrong spot.
Work out the framing in daylight if you can. Hoodoos that look identical to the eye after dark often photograph very differently depending on which one sits dead-center versus off to one side, and a headlamp beam at 2 a.m. is a poor substitute for having already picked your spot.
Featured · Destination
Stargazing in Bryce Canyon National Park
Bryce Canyon earned Gold-Tier Dark Sky Park status in 2019 after 50 years of astronomy programs. Drive in from Vegas or Salt Lake City to see it for yourself.
Manual Settings for the Milky Way Core
Start with ISO 3200 to 6400, the typical range for Milky Way photography[4], and adjust from there depending on how wide your aperture and how long your shutter already run. A brighter aperture buys you room to bring ISO down; a narrower one pushes you toward the top of that range, and toward more visible noise in the final file.
Two settings matter as much as any number on the dial. Shoot RAW, not JPEG, so the shadow and color detail in the hoodoo field below survives editing afterward; a compressed file throws that data away before you ever get home. And switch to manual focus locked at true infinity before the first frame. Autofocus hunts uselessly in near-total darkness, and a lens's infinity mark is rarely exact, so zoom in on a bright star on the rear screen and adjust the ring by hand until it's a sharp point rather than a soft blob.
Shutter speed has a hard ceiling before stars stop looking like points of light and start looking like short streaks. The 500 Rule, 500 divided by your lens's focal length, gives the maximum exposure time before that trailing becomes visible[5]. A 20mm lens tops out around 25 seconds; a 14mm lens buys a little more room before the same blur appears. In practice, most Milky Way shots at Bryce land in a 10 to 25 second window, matching that math rather than fighting it.
Running the numbers against a few common focal lengths makes the ceiling easier to plan around before you're standing at the rail guessing:
| Focal length | 500 Rule max exposure | Typical ISO |
|---|---|---|
| 14mm | ~35 seconds | 3200-6400 |
| 20mm | ~25 seconds | 3200-6400 |
| 24mm | ~20 seconds | 3200-6400 |
High-Elevation Cold: Batteries and Condensation
Bryce's rim sits at roughly 8,000 feet on the Paunsaugunt Plateau[6], and the same thin air that keeps the sky so transparent works against you the moment the sun goes down. It's a real cold, not an Arctic one: nowhere near the deep sub-zero nights a destination like Abisko routinely sees, but cold enough to drain a battery faster than it would at sea level, and cold enough that standing still at a rail for an hour-long exposure sequence earns real layers, not just a jacket.
Lithium-ion camera batteries begin losing noticeable performance below freezing, and once temperatures drop toward roughly -10°C, expect a significant reduction in shooting time[7]. Bryce's rim doesn't reach deep-Arctic extremes on most nights, but a clear, high-elevation night in shoulder season or winter can still get cold enough for that drop to matter, and there's no reliable way to know exactly how cold a given night will run without checking a current forecast before you drive up.
Recommended tours
Tours are selected for quality, not commission. I earn a small fee if you book — at no extra cost to you.




The field fix is the same one photographers use anywhere the mercury drops: keep spare batteries warm against your body, not in an outer bag pocket, and pair a spare with a hand warmer inside a small pouch on longer sessions. Swap the active battery out once it drops below roughly a fifth of its charge, and let the depleted one recover somewhere warm.
Featured · Article
Stargazing Gear for Beginners: Binoculars to Telescopes
New to stargazing gear? This guide breaks down binoculars, telescopes, and smart telescopes, so you know what to buy first and what to skip for right now.
The bigger risk isn't the cold itself. It's carrying a cold camera straight into a warm room afterward, which lets condensation form on the lens, sensor, and internals. Seal the camera in an airtight bag before bringing it indoors, and let it acclimate to room temperature gradually rather than exposing it to a sudden warm environment[8]. Give it roughly an hour before opening the bag, and pull the battery out separately if it still feels damp.
The altitude itself is worth respecting on a personal level too, separate from anything to do with the camera. Some visitors feel more short of breath or more tired than sea-level habits would predict at this height, worth building into your night with longer breaks and less gear carried at once, rather than treating it as anything specific to the equipment itself.
Planning a Night Shoot: Timing, Checklist, and What to Bring
Gear alone doesn't guarantee a shot. the seasonal breakdown for Bryce Canyon covers the new-moon windows and seasonal weather patterns that decide whether the sky is worth setting up for on a given night, information no lens or tripod can substitute for.
A basic kit checklist covers most of what a first Bryce Canyon night shoot needs:
- A mirrorless or DSLR body with manual mode, set to shoot RAW
- A fast wide-angle lens, f/2.8 or wider, in the 14-24mm range
- A sturdy tripod, locked down against wind at the rail
- An intervalometer or built-in interval timer, if you're planning a longer sequence
- Two or three spare batteries, kept warm against your body
- A headlamp with a red-light mode, so you don't ruin your own night vision setting up
If you're building a kit from nothing rather than adapting one you already own, stargazing gear for beginners covers the tiers below a dedicated camera, binoculars, telescopes, and smart telescopes, worth knowing before deciding a full astrophotography setup is what this trip actually needs. And whatever gear ends up in the bag, dark sky etiquette covers the red-light discipline and quiet-hours habits that keep a rim overlook usable for everyone else at it, camera or not.
One more practical note before you drive up: staying at the rim-side lodge, a short walk from the amphitheater rim, means a cold camera can go back into a warm room without a long drive in between, exactly the kind of window where a sealed bag and a little patience save a sensor.