
Why Lapland's Cold and Glass Igloos Change the Gear Equation
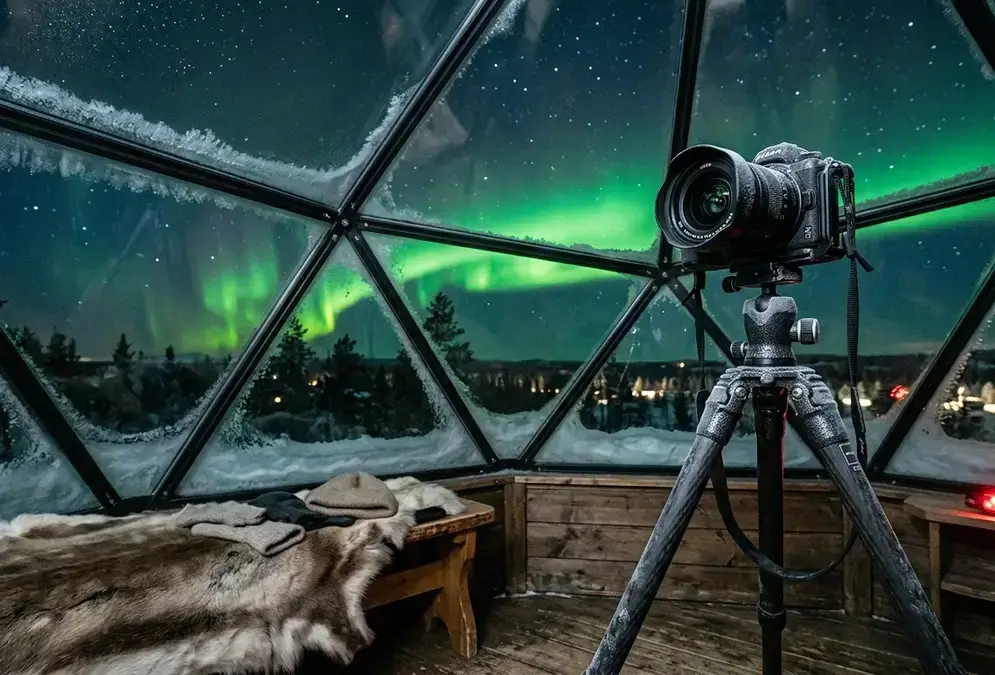
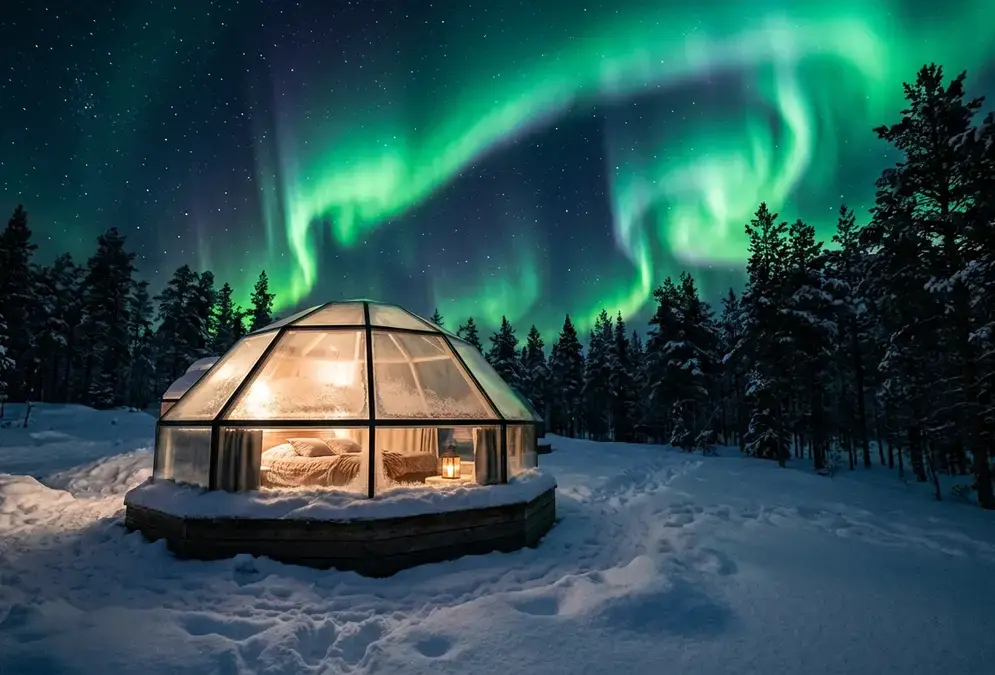
Lapland's winter cold falls in the range that wrecks gear across the Arctic, commonly -20°C to -30°C, colder on a bad night. What sets Lapland apart from Fairbanks or Tromsø isn't the thermometer reading, it's the glass igloo. Properties like Kakslauttanen and Levi Igloos sell the promise of watching the aurora from a heated bed, and that promise creates a second gear hazard nobody mentions until their lens fogs over mid-shoot: moving equipment between a -30°C exterior and a 20-25°C heated interior[2].
That temperature swing, not the cold on its own, is the single biggest equipment risk this guide addresses. A camera that survives a full night outside can still get ruined in the ninety seconds it takes to carry it back through an igloo door. Everything from body choice to battery rotation below assumes you're managing both problems at once, not just one.
Featured · Destination
Northern Lights in Finnish Lapland
Finnish Lapland's whole-region aurora guide: glass igloos, Santa Claus Village, six bases from Rovaniemi to Inari, aurora season Sep–Mar, no road drama.
Check the best time to see northern lights in Lapland before you pack, since gear only matters on a night the aurora actually shows up, and the full Finnish Lapland aurora guide covers which of the region's six bases puts you closest to a genuinely dark sky.
Camera Body and Lens: Full-Frame, Fast Glass, Manual Focus
A full-frame DSLR or mirrorless body with a genuine manual mode is the starting point, and the choice between DSLR and mirrorless matters more in Lapland than it does in milder climates. Mirrorless bodies draw 50 to 70 percent more battery than DSLRs in extreme cold, a direct result of running the electronic viewfinder and rear screen continuously instead of an optical viewfinder that needs no power at all[3]. If you already own a DSLR, this is a good year to bring it instead of upgrading. If mirrorless is what you have, budget for more spares than a DSLR shooter would need, not fewer.
Beyond body type, look for high-ISO capability at 3200 and above, a weather-sealed chassis, and compatibility with fast wide-angle glass. The lens matters more than the body: f/1.4 to f/2.8 is the working range, faster gathering more light in Lapland's deep polar darkness, and a 14 to 24mm focal length holds enough sky to frame an aurora arc without cropping it. Three lenses come up repeatedly among Lapland aurora photographers:
50-70%
- Sony FE 14mm f/1.8 GM: sharp wide open, native to Sony mirrorless bodies
- Nikon AF-S 14-24mm f/2.8: the standard Nikon zoom, flexible enough to frame an igloo roof and a fell horizon in the same shot
- Canon EF 15-35mm f/2.8: a dependable all-rounder, a stop slower than the primes above but versatile
Strip off any filter before shooting; each glass surface adds a faint reflection and quietly cuts the aurora signal reaching the sensor.
Camera Settings Starting Points for Lapland Aurora
Start at ISO 800 to 3200, increasing if the display is faint, aperture at the widest available (f/1.4 to f/2.8), and a 5 to 25 second shutter: shorter, 5 to 10 seconds, for a fast-moving aurora, longer, 20 to 25 seconds, for a slow diffuse glow. Focus manually and set to infinity before the aurora appears; autofocus can't lock onto anything this dim. Shoot RAW with white balance set to daylight (5500K) or a cooler 3500-4000K, and skip Auto White Balance, which can shift the aurora's actual color.
A bright moon changes these settings, too: it typically shortens the working range to 8 to 15 seconds and renders more foreground snow detail, but only pays off on a strong display. Does a full moon ruin the northern lights in Lapland breaks down which moon phase helps and which one washes a faint aurora out.
Tripod and Handling Gear at -30°C
Carbon fiber beats aluminum in Lapland for a straightforward reason: at -30°C, aluminum tripod legs become genuinely painful to handle bare-handed and brittle enough to risk cracking, while carbon fiber stays workable through the same cold[4]. If you're buying a tripod specifically for this trip, carbon fiber earns its price here more than it would in a milder climate.
Whatever material you bring, the ball head matters as much as the legs. Choose one you can lock and release smoothly through thick gloves, tested before you're standing in the snow at midnight fumbling with a knob you've never touched with mittens on. Between shooting sessions, especially if you're stepping in and out of a heated igloo or lodge repeatedly through the night, store the tripod in an insulated bag rather than leaving it outside the whole time. A tripod cold-soaked to -30°C takes real time to warm back up, and repeated freeze-thaw cycling on the same joints adds wear a single overnight exposure wouldn't.
| Material | Behavior at -30°C | Best for Lapland aurora work |
|---|---|---|
| Aluminum | Painful to handle bare-handed, brittle enough to risk cracking | Avoid for extended outdoor sessions |
| Carbon fiber | Stays workable, dampens vibration during long exposures | Recommended, especially for trips built around this cold specifically |
Look for a heavy or weighted base for stability in open, wind-exposed spots away from town, a quick-release plate operable without removing your outer mitts, and rubber or spiked feet with enough grip to hold on packed snow and ice.
Batteries: Managing Power Through a Lapland Night
Deep cold drains a battery fast, and Lapland's -20°C to -30°C nights can empty a spare in as little as 45 minutes, especially on a mirrorless body already drawing more power than a DSLR. Carry a minimum of two to three spare batteries per body[5] for a full night, and treat that as a floor, not a comfortable margin, if you're shooting mirrorless.
Recommended tours
Tours are selected for quality, not commission. I earn a small fee if you book — at no extra cost to you.




Storage matters as much as quantity. Keep spares in an inner jacket pocket against body heat, never in a camera bag left exposed to ambient air, which does nothing to slow the chemical reaction that's draining them. Rotate a warm spare in the moment the active battery's indicator drops, rather than waiting for it to die entirely; a battery allowed to fully deplete in the cold recovers less predictably than one swapped out early.
A rotation that works through a four-to-six-hour aurora session:
Read next · Tour
Lapland Aurora Photography Tour
Guided aurora photography tour from Rovaniemi, Finnish Lapland. Small groups, camera coaching, cold-weather battery tips. From €240, 7–10 hours, Sep–Mar.
- Fully charge every battery indoors before heading out; a partial charge drains faster outdoors
- Keep spares against your body, not in your bag, from the moment you step outside
- Swap in a warm spare as soon as the active one shows any drop, not once it's critically low
- Turn off Wi-Fi, Bluetooth, GPS, image stabilization, and live view, and dim the screen wherever your camera allows it
- Carry more spares than you think you need if you're shooting mirrorless; the higher draw compounds over a long session
The Glass Igloo Condensation Problem
Condensation, not the cold itself, causes the lasting damage, and a glass igloo makes the risk worse than a standard hotel room would. Moving gear straight from -30°C exterior air into a heated 20-25°C igloo interior is the single biggest equipment risk in this climate[1]; humid indoor air condenses directly onto and inside a cold lens the moment it crosses the threshold.
Assemble your lens, filters, and any accessories outside in the cold, never indoors before you step out. Attaching gear in a warm room and then walking into -30°C air lets moisture condense inside the lens barrel as it cools, sometimes freezing there before you've taken a single frame.
Before bringing the camera back inside, seal it in a plastic bag while you're still in the cold, then let it warm gradually for 20 to 30 minutes before opening the bag. Condensation still forms, just on the outside of the plastic instead of on your glass and sensor.
Shooting from inside the igloo itself creates its own problem: the dome glass fogs with interior condensation faster than you'd expect, especially once a few people have been breathing in the room for a while. Where the property offers them, shoot through the open ventilation portholes rather than through the dome glass, which sidesteps the fogging entirely instead of fighting it with a lens cloth between every frame.
Putting It All Together: A Lapland-Ready Kit
A kit built for Lapland's specific combination looks different from one built for cold alone. Beyond the camera, lens, and tripod above, a few smaller additions earn their weight:
- A microfiber cloth kept dry and separate from anything used for snow or moisture, for the moment your lens does fog despite your best habits
- A mechanical or wired shutter release rather than a wireless one; wireless triggers depend on a battery and signal that both perform worse in deep cold
- Memory cards rated for extended temperature ranges; budget cards can behave unpredictably below -20°C
- A spare set of thin glove liners you can wear under mittens while actually operating dials and buttons
None of this replaces the two habits that matter most: assemble outside, never in, and rotate batteries before they die rather than after. Get those two right and the rest of the kit just has to survive the night, not perform miracles.
None of this gear matters on a night with no aurora to shoot, so check the Lapland aurora forecast before you commit to standing outside in -30°C for hours.