
Why Uluru rewards a dedicated camera over a phone

A dedicated camera resolves what an Uluru night sky actually holds: the dust lanes threading the galactic core, the faint stars behind them, individual points of light sharp enough to hold up printed large. That resolution comes from sensor size, a fast lens, and manual control over exposure, three things worth carrying the extra weight and complexity for if you want a genuinely detailed result. (If you'd rather travel lighter, smartphone stargazing photography at Uluru covers a much simpler approach.)

This guide is for the traveller packing a mirrorless or DSLR camera specifically to photograph Uluru stargazing, and it breaks down into four categories:

  • A fast, wide lens that can gather enough light in a short exposure
  • Camera settings tuned for near-total darkness
  • A tripod and dust protection built for red desert conditions
  • A shooting plan built around the sky itself, not just the gear
Get those four right and the rest of the trip, the drive out, the cold, the waiting, pays off in a frame worth keeping.

The lens that actually matters: fast and wide

Aperture decides more of an Uluru Milky Way photograph than any other setting. A lens that opens to f/2.8 or faster gathers roughly four times the light of an f/5.6 kit lens in the same exposure time, which matters enormously when a long shutter speed starts smearing stars into short trails instead of points. Wide focal lengths, roughly 14mm to 24mm on a full-frame body, do double duty: they gather more of the sky in one frame, and they're more forgiving of the Earth's rotation than a telephoto, so you can hold a longer exposure before stars start to blur.
None of this is theoretical for Uluru specifically. One astrophotography team shooting the galactic core over the rock carried a Sigma 24mm alongside a Canon RF 15-35mm[1], a pairing that covers both a tight, dramatic composition and a wider frame that keeps Uluru's whole silhouette in shot with room for sky above it. You don't need those exact lenses. You need a fast, wide lens you already know in that focal-length range, and ideally one you've already practiced with at night before you're standing in the dark relying on it for the first time.

f/2.8 vs. f/5.6

A lens that opens to f/2.8 gathers roughly four times the light of a typical f/5.6 kit lens at the same shutter speed and ISO, the difference between a Milky Way with visible structure and a flat, noisy sky.

A few lens habits worth building before the trip:

  • Shoot wide open, or one stop down if your lens is soft at maximum aperture
  • Practise manual focus at home in the dark, not for the first time at Uluru
  • Bring a lens hood and a cloth, since dew and dust both collect on front elements overnight

Camera settings for a Southern Hemisphere galactic core

Autofocus doesn't work once the sky goes properly dark, so every setting from here on is manual. Start with focus: switch the lens to manual, use live view zoomed into a bright star or planet, and turn the focus ring until that point is as small and sharp as it gets. Infinity on the lens barrel is a starting guess, not a setting to trust blind, since manufacturing tolerances shift true infinity focus slightly from lens to lens.
Exposure for the Milky Way is a balance of three settings pulling against each other. Aperture stays wide open, at whatever f/2.8 or faster your lens allows. ISO typically lands somewhere between 3200 and 6400 on a modern full-frame sensor, high enough to register faint starlight without drowning the image in noise. Shutter speed is the setting most beginners get wrong: leave it open too long and the Earth's rotation turns pinpoint stars into short streaks. A rough guide is to divide 500 by your lens's focal length to get a maximum exposure time in seconds before trailing becomes obvious, a starting point to fine-tune once you're reviewing shots on the camera's screen rather than a fixed rule.
Autofocus doesn't work once the sky goes properly dark, so every setting from here on is manual.

Two pieces of gear make all of this easier to execute consistently:

  • An intervalometer, built in on most modern mirrorless bodies or attached as a cheap remote, removes the vibration of pressing the shutter by hand and lets you fire off a sequence of identical exposures unattended
  • A star tracker, a small motorised mount that rotates the camera to match the sky's movement, lets you push exposures well past what a static tripod allows, useful for a genuinely deep, low-noise shot of the core rather than a single quick frame
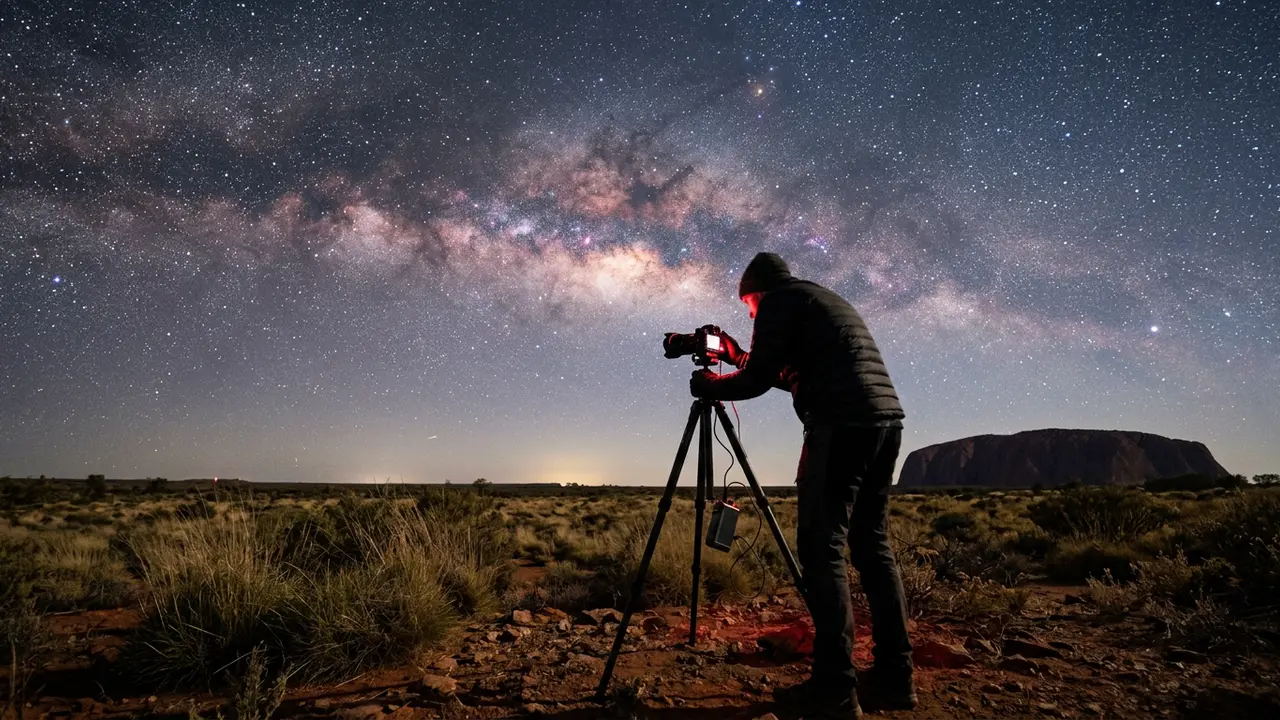
Photographer using Uluru astrophotography gear, a camera on a carbon-fibre tripod aimed at the galactic core with Uluru's dark silhouette on the horizon

Photographer using Uluru astrophotography gear, a camera on a carbon-fibre tripod aimed at the galactic core with Uluru's dark silhouette on the horizon

Uluru's foreground is the other half of the photograph, and it rarely exposes correctly in the same frame as the sky. The rock at night is either a flat black silhouette or, lit by starlight and a rising moon, a shape with real texture worth keeping. Most photographers solve this by shooting two exposures from a locked-off tripod, one metered for the sky and one longer or brighter exposure metered for the foreground, then blending the two in post-processing. It's a technique, not a trick: the final image still shows exactly what the scene looked like, just compressed into a dynamic range no camera sensor can capture in a single frame.

Tripods and dust protection for the desert
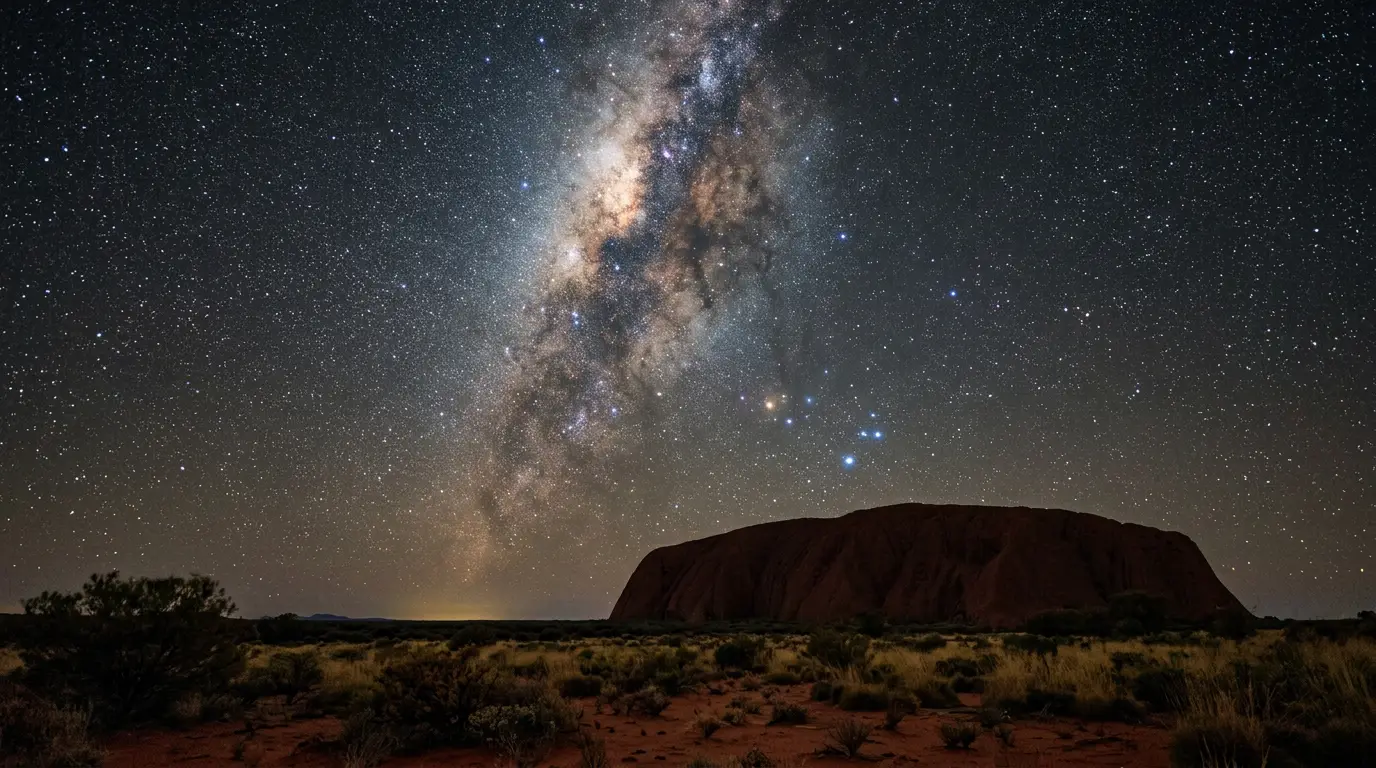
A tripod at Uluru does more work than holding a camera level. It has to stay rigid in the wind that regularly picks up across open desert after dark, and it has to survive fine red sand that works into every joint, lock, and leg-twist mechanism it can reach. Carbon-fibre tripods are the standard recommendation for exactly this reason: lighter to carry across the walking tracks to a shooting spot, and less prone to the metal-on-metal grinding that sand causes in aluminium leg sections over a multi-day trip.
Treat dust as a maintenance routine, not a one-off precaution. Wipe down tripod legs and camera mounts after every session, before packing gear away for the night, rather than after sand has had time to work its way into a lens barrel or leg lock. A simple rocket blower and a soft brush handle most of it; avoid canned air, which can push fine sand deeper into a mechanism instead of clearing it. If you're also working through the Uluru stargazing packing list for the rest of your night-session layers, pack a dry bag or sealed pouch alongside it specifically for the camera when you're not actively shooting.

Featured · Destination

Uluru

Stargaze at Uluru on Anangu-owned, jointly managed land: the Milky Way's core, Magellanic Clouds and Southern Cross over Australia's red-centre outback.

A tripod checklist worth running through before you leave the hotel:

  • Legs and head rated to hold your camera and lens steady in a stiff breeze, not just on a still night
  • A centre column you can lower or remove for shots low to the ground
  • Rubber or spiked feet that grip loose gravel rather than sinking or sliding
  • A quick-release plate you've practised attaching in the dark, since fumbling with it costs you the best minutes of a session

Planning the shot: season, moon phase, and where to stand

Gear only pays off if you're pointed at the right sky on the right night. Photographers commonly call the Australian winter "Milky Way season" at Uluru, the stretch when the galactic core sits high and dramatic against a dark sky, and the park itself keeps shorter opening hours through those winter months[2]. The best time to see stars at Uluru walks through how that season compares with the rest of the year in more depth; for a photographer specifically, it's the window worth building a trip around.
Moon phase matters as much as season. A bright moon washes out the same faint dust lanes and star clusters a fast lens is trying to capture, so check the lunar calendar alongside the season and aim for a night within a few days of new moon. Once the core has set or the moon has risen, the sky doesn't go empty: the Southern Cross and the two Magellanic Clouds, satellite galaxies visible to the naked eye from the Southern Hemisphere, are worth composing for in their own right rather than treating as a consolation prize.
Where you set up matters too, and it's not something to work out for the first time in the dark. Astrophotographers are advised to scout a shooting location in daylight first, since finding the same spot again once the sun is down is considerably harder than it sounds[3]. The best stargazing spots at Uluru covers specific vantage points; whichever one you pick, walk it in daylight, note the landmarks you'll need to find it blind, and arrive with enough time before the session to set up without rushing.

Featured · Article

What Is Light Pollution? Definition, Types, and Solutions

Light pollution is artificial light brightening the night sky, affecting 80% of the world. Learn the 4 types, wildlife and health effects, and how to fix it.

Photographing Uluru as a guest on Anangu land

Uluru-Kata Tjuta National Park is jointly managed by Parks Australia and the Anangu, the Traditional Owners of the land, and that relationship shapes what you're asked not to photograph as much as it shapes anything else about a visit. Some specific sites within the park are culturally sensitive and sacred to Anangu, and visitors and permit holders alike are asked not to photograph those particular areas[4]. This isn't a vague suggestion left to guesswork: the no-photography sites are identified on signage, visitor maps, and the official park website[5], so there's no ambiguity about where the line sits once you're actually standing in the park.
Respect that line without needing to know exactly which features it covers. Read the signage at each viewing area before you set up, check the park's official information if you're planning shots in advance, and ask a ranger if anything is unclear on the day. None of this should feel like a restriction weighing down a trip. It's the baseline courtesy of photographing on someone else's sacred land, no different in principle from not photographing inside a place of worship without asking first.
The etiquette scales up if your photography goes beyond a personal trip. Anyone intending to capture images, footage, or recordings of the park for commercial or public purposes needs a permit or licence before shooting[6], and applicants are asked to give 14 to 28 days' notice when they apply[7]. That covers everything from a paid photo tour to content shot for a publication or a brand. A personal camera and a personal trip don't trigger that requirement, but it's worth knowing the line exists if a shoot at Uluru is ever more than a holiday photo.
If you want the fuller picture of why these places matter so much to the Anangu, not just where the photography boundaries sit, Uluru's cultural significance and visitor etiquette covers the history and context behind these rules in more depth. Bring a good lens to Uluru. Bring the same respect you'd want extended to something sacred to you.